

Four methods reliably produce opaque, durable prints on dark shirts: screen printing with a white underbase, DTG with a white underbase on cotton, DTF transfers, and HTV for simple vector graphics. Pick by artwork complexity and run size. One photo? Use DTF or DTG. A hundred units of a two-color logo? Screen printing. The reason any of this matters: dark fabric absorbs light and swallows color unless you build an opaque barrier underneath it first.
TL;DR:
- Using DTF transfers or DTG is ideal for small batches with complex, full-color images on dark shirts due to their ability to produce opaque, vibrant prints without extensive setup.
- Screen printing offers the lowest per-unit cost and highest durability at larger volumes, especially for simple designs with 1 to 3 colors, but requires precise mesh and curing procedures.
- Proper pre-treatment and curing are critical for DTG prints on cotton to prevent cracking and fading, with fabric type significantly affecting final durability.
- DTF transfers eliminate the need for pre-treatment, work on multiple fabric types, and deliver quality comparable to DTG for small and medium runs without extensive setup.
- For reliable dark-shirt printing, shops should log process parameters consistently and perform sample testing to prevent issues like haloing, dye migration, or cracking during production.
Table of Contents
- Fast Decision Guide: Picking the Right Method for Your Job
- Screen Printing on Dark Shirts: Building the Underbase, Mesh, and Cure
- DTG on Dark Shirts: Pre-Treatment and the White Underbase Trade-Off
- DTF Transfers: The Print-on-Anything Option
- HTV and Sublimation Workarounds for Dark Shirts
- Fabrics and Ink Chemistry: Avoiding Dye Migration
- Step-by-Step Checklists for Prep, Print, Cure, and Quality Checks
- Troubleshooting Common Failures and How to Fix Them
- Durability and Care: What to Expect From Each Method
- When to Hire a Pro and What Tekton LA Provides
- The One Habit That Separates a Reliable Shop From a Guessing Game
- Get Dark-Shirt Prints Done Right, No Guesswork Required
- Trade Resources Behind This Guide
- Sources
Fast Decision Guide: Picking the Right Method for Your Job
The method that wins comes down to three variables: how many shirts you need, how complex the art is, and how much hand-feel you’re willing to sacrifice for opacity. Get the match wrong and you’ll either overpay for a one-off screen setup or underdeliver on a big order with a method that can’t hold color at volume.
Here’s how the four core options stack up against each other in practice:
- Single photo or one-off gift: DTF or DTG. Both handle full-color, gradient-heavy art without a single screen. DTG wins on hand-feel if you’re printing on 100% cotton; DTF wins on fabric flexibility and turnaround.
- Small batch, 2 to 24 units: DTF is usually the sweet spot. No pre-treatment, no screens, and you can print exactly what you need with zero setup waste.
- Medium run, 25 to 99 units: This is where screen printing starts pulling ahead on cost-per-unit if the design is simple (1 to 3 colors), but DTF still wins for full-color or photo-realistic art at this volume.
- 100+ units, simple design: Screen printing with a proper underbase wins on price and durability every time. The setup cost amortizes fast, and plastisol holds up to commercial laundering better than most transfer methods.
- Simple logo, vector shapes, low budget: HTV (heat transfer vinyl) works fine here, especially for team orders or one-color designs where you already own a cutter and press.
The trade-offs are predictable once you see them side by side. Screen printing gives you the best durability and the lowest per-unit cost at scale, but it demands the most technical setup and doesn’t handle photographic detail well. DTG delivers the most photo-realistic results on cotton but adds pre-treatment steps and struggles on poly blends. DTF splits the difference: strong detail, works on almost any fabric, but the hand-feel sits between DTG and a thick screen print. HTV is the cheapest entry point but can’t do gradients or fine text reliably.
One thing worth flagging before you get further into this: sublimation on dark shirts, by itself, does not work. Sublimation dye turns transparent when heated, which is exactly why it looks great on white polyester and disappears into black fabric. You need a white barrier, usually an HTV base layer, before sublimation ink has anything to show up against. More on that workaround later.
Screen Printing on Dark Shirts: Building the Underbase, Mesh, and Cure
Screen printing solves the dark-fabric problem the same way it has for decades: a white or light-colored underbase printed first, flashed to a gel state, then topped with your actual colors. Get the underbase wrong and everything on top of it looks muddy no matter how good your top-color ink is.
Opacity starts with mesh count, not ink volume. For the underbase layer, most shops run 86 to 110 mesh, which deposits enough ink to block the garment color in a single pass when everything else is dialed in correctly. Doubling up thin underbase passes is a common fix people reach for, but mesh selection and ink viscosity matter more than adding layers — two thin, poorly chosen passes often produce worse opacity than one correct one, plus you risk registration drift between passes.
Here’s the sequence that actually works on a manual or automatic press:
- Print the underbase using a high-opacity plastisol white through your 86 to 110 mesh screen, using firm, even squeegee pressure.
- Flash to gel, not full cure. You want the surface tacky enough to accept the next layer without lifting, typically 200 to 260°F at the garment surface, checked with an infrared thermometer, not a guess.
- Print your color layers on top of the flashed underbase, using a lower mesh count (156 to 200) for detail work since these layers don’t need to fight for opacity anymore.
- Final cure at full temperature, generally 320°F at the ink surface for plastisol, held long enough for complete gelation. This is the step people rush, and it’s the single biggest cause of cracked or peeling prints down the line.
For inks, plastisol delivers better opacity and vibrancy than water-based ink on dark fabric, which is why it dominates commercial dark-shirt work. Water-based inks can work for a softer hand-feel, but they need more underbase passes to hit the same opacity, which adds cost and cure time.
Registration and haloing are where a lot of otherwise-good underbases fall apart. If your underbase print is even slightly larger than your top color, you get a visible white ring, or “halo,” around the edges of your design. The fix is choking the underbase, printing it about 0.5 to 1 pixel smaller than the top color art, so any registration drift hides the underbase rather than exposing it.
Pro Tip: Print a test underbase on scrap dark fabric and hold it up to a light source before committing to a full run. If you can still see garment color bleeding through at the seams of your design, you need a second underbase pass or a coarser mesh, not more top-color ink.
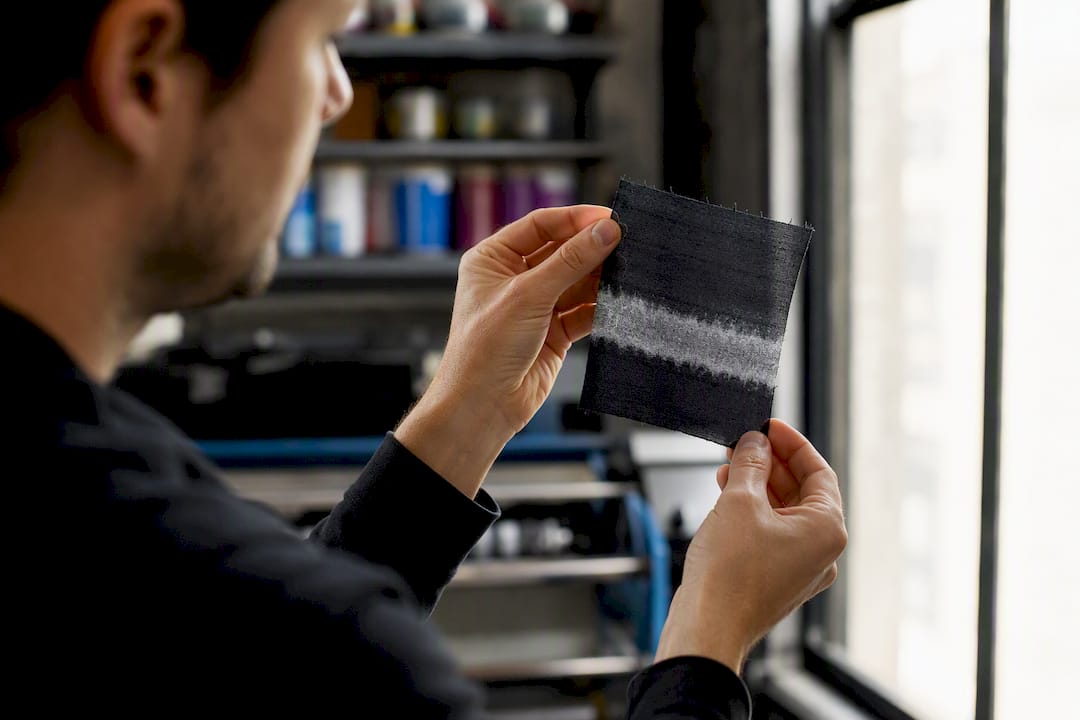
For complex, multi-color art, some shops split screens so one handles pure opacity and another handles fine detail, rather than asking a single underbase screen to do both jobs. If you’re new to the mechanics of silk screening in general, it helps to start with the basics of how the process works before tackling dark-garment specifics.
DTG on Dark Shirts: Pre-Treatment and the White Underbase Trade-Off
Direct-to-garment printing can put a photograph on a black t-shirt with color accuracy that screen printing simply can’t match without a dozen screens. The catch is pre-treatment, and skipping it is the main cause DIY DTG attempts on dark shirts fail.
Pre-treatment isn’t optional here. It’s a fixative spray applied to the garment before printing that does two jobs: it helps the white underbase ink bond to the cotton fibers, and it keeps that white layer from sinking into the weave and turning gray. Without it, your white underbase soaks into the fabric unevenly and every color printed on top looks washed out and patchy.
That white underbase layer is also where DTG’s biggest trade-off shows up. The printer lays down white ink first, then color on top, similar in concept to the screen-printing underbase but built at a microscopic scale by inkjet. Layer too much white to chase opacity and you get:
- A stiffer hand-feel across the printed area, noticeable when you fold or stretch the shirt.
- Increased risk of cracking at fold points after repeated washing, especially on designs with large solid-color fields.
- Longer cure times, since more ink volume needs more heat exposure to set properly.
Fabric choice matters more with DTG than almost any other method. 100% ring-spun cotton is the standard because its tight, uniform fiber structure holds pretreatment and ink consistently. Poly blends fight DTG on two fronts: pretreatment doesn’t bond well to synthetic fibers, and the heat needed to cure DTG ink can scorch or discolor polyester before the ink fully sets. A 50/50 blend will work, but expect softer color saturation and more variability shirt to shirt than you’d get on straight cotton.
Cure windows for DTG typically run through a conveyor dryer or heat press at 305 to 330°F for enough dwell time to fully gel the water-based inks used in most DTG systems. Rush this step and the print feels tacky even after it cools, a sign it never fully cured.
DTG prints on properly pretreated cotton generally hold up to dozens of home washes when cared for correctly, though real-world durability depends heavily on whether pre-treatment coverage was even and whether the cure hit full temperature across the entire print area, not just the center. For anyone weighing DTG against the other methods on this list, it’s worth reading a fuller breakdown of what direct-to-garment printing actually involves before committing a whole order to it.
DTF Transfers: The Print-on-Anything Option
DTF, or direct-to-film transfer, sidesteps almost every dark-shirt problem the other methods have to engineer around, because the white underbase is already built into the transfer before it ever touches the garment.
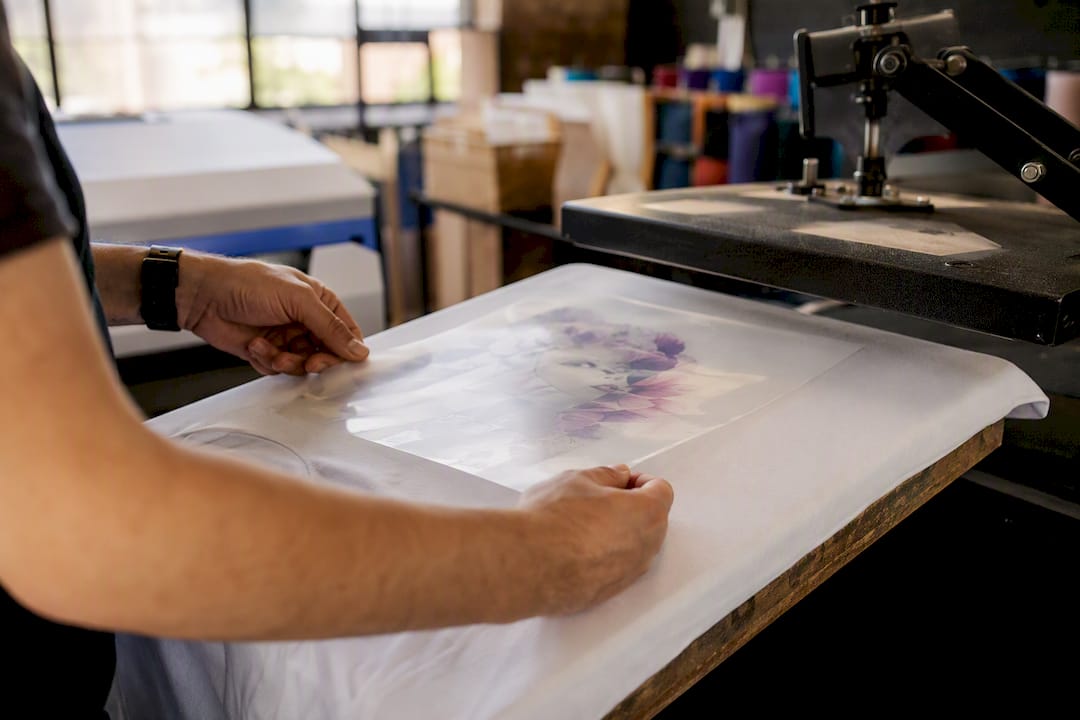
The workflow runs in four stages. First, your design prints onto PET film using a specialized printer, with white ink automatically laid down as the base layer wherever your design needs opacity. Second, a hot-melt adhesive powder gets applied to the wet ink and shaken off where it isn’t needed. Third, the film runs through a curing oven or press to melt that powder into a bonded adhesive layer. Fourth, and this is the step that happens whenever you’re ready, the film gets heat-pressed onto the actual garment, transferring the design and its white base in one motion.
Because the white layer travels with the transfer film itself rather than being printed directly onto the fabric, DTF sidesteps pre-treatment entirely and works on cotton, polyester, blends, and even some non-apparel substrates without reformulating your process for each one. That’s a real advantage over DTG, which needs different pre-treatment strategies depending on fiber content.
A few practical notes if you’re running DTF transfers yourself:
- Heat-press settings typically run 300 to 315°F for 10 to 15 seconds with firm, even pressure, though this varies by film and powder brand, so always check the manufacturer’s spec sheet first.
- Peel timing matters: most DTF films are designed for a cold peel, meaning you let the transfer cool completely before removing the film backing. Peeling hot is the most common cause of edge lift and cracking.
- A second, lighter press pass (5 to 10 seconds, no film, just parchment paper) after peeling improves adhesion and gives the print a slightly softer hand-feel.
- Store unpressed transfers flat, away from heat and direct sunlight, and they’ll hold their adhesive properties for months, which is genuinely useful if you batch-print film ahead of actual orders.
DTF has closed most of the quality gap with DTG on dark garments while skipping the pre-treatment fuss entirely, which is a big part of why it’s become the default entry point for small-batch sellers testing new designs. If you want the deeper mechanics of the film-to-fabric process, Tekton LA’s DTF breakdown covers the equipment side in more detail.
HTV and Sublimation Workarounds for Dark Shirts
If you don’t own a screen press or a DTG printer, heat transfer vinyl is the most accessible way to get a clean, opaque design on a dark shirt, provided your art is simple.
White or printable HTV works as its own built-in underbase. White HTV is a solid-color vinyl you cut into shapes on a vinyl cutter and press directly onto the shirt, which is ideal for logos, numbers, and single-color text but useless for gradients or photo-realistic detail. Printable HTV flips that: you print full-color art onto a clear or white HTV sheet with an inkjet printer, then cut and press it, giving you more color range than solid vinyl while still needing simple, bold shapes rather than fine gradients to look clean.
For anyone chasing a sublimation look on a dark shirt specifically, know that sublimation dye alone won’t show up on dark fabric because it becomes transparent when heat-activated, which is why it’s built for white polyester. The workaround: press a white HTV base layer or a sublimation-specific coating spray onto the dark shirt first, let it cure, then sublimate on top of that white layer. It works, but reliability varies by brand and by how evenly the base layer cures, so test batches before you promise a client a finished look.
Here’s a simple process for either approach:
- Cut your design on a vinyl cutter, mirrored if you’re working with printable HTV, using a blade depth that scores the vinyl without cutting through the backing.
- Weed the excess vinyl, removing everything outside your design so only the shapes you want remain on the carrier sheet.
- Preheat the garment for 5 seconds to remove moisture and wrinkles, since trapped moisture is a common cause of poor adhesion.
- Press at 305 to 320°F for 10 to 15 seconds with medium to firm pressure, then peel according to the vinyl brand’s hot or cold peel instructions.
- Press again for a few seconds with a Teflon sheet if the brand recommends a second pass for full adhesion.
Pro Tip: Run a fingernail test after the shirt cools completely. Scratch gently at a vinyl edge. If it lifts with light pressure, your press either ran too cool or didn’t hold pressure long enough. Re-press before shipping, not after a customer complains.
Fabrics and Ink Chemistry: Avoiding Dye Migration
Dark polyester is where a lot of otherwise-solid print jobs go sideways after the fact, usually not at the press but weeks later, when the shirt gets left in a hot car or run through a high-heat dryer.
Dye migration happens because polyester is dyed with disperse dyes, which are engineered to move when heated. Print white ink on a dark poly shirt, cure it at standard temperature, and the garment’s own dye can sublimate upward into that white layer during the cure or during later heat exposure, turning crisp white ink a dingy pink, yellow, or gray. This is a well-known failure mode in poly and poly-blend printing, and it’s why low-cure plastisols and dye-blocking whites exist specifically for this fabric category, even though there’s no single definitive study to point to for exact bleed percentages by fabric brand.
Practical guardrails that actually prevent this:
- Use a low-cure, dye-blocking white ink formulated for polyester, which cures at a lower temperature than standard plastisol and includes a barrier layer to resist upward dye movement.
- Test your exact garment at your exact cure temperature before running a full order. Dye migration risk varies by fabric supplier, dye lot, and even the specific red or dark navy shade, so a formula that worked on one batch of shirts isn’t guaranteed on the next.
- Prefer discharge ink on 100% reactive-dyed cotton when you want a soft hand-feel and don’t need the fabric-agnostic flexibility plastisol offers. Discharge won’t work on poly at all, so confirm fiber content before committing.
- Source blanks from suppliers who disclose fiber content and dye process clearly, since an unlabeled “cotton-feel” blank is often a poly blend in disguise, and that mislabeling is exactly what triggers unplanned migration on press day.
Step-by-Step Checklists for Prep, Print, Cure, and Quality Checks
A dark-shirt job that goes wrong almost always traces back to a skipped step, not a bad machine. Running through these checklists before, during, and after production catches most failures before they reach a customer.
Pre-press checklist:
- Confirm fabric content (100% cotton, poly, or blend) and match your method and ink chemistry to it.
- Finalize art separations, with underbase art choked 0.5 to 1 pixel smaller than top-color art to prevent haloing.
- Select mesh count: 86 to 110 for underbase, 156 to 200 for detail color layers.
- Confirm press or printer settings match the ink or transfer manufacturer’s spec sheet, not last month’s job notes.
Press-run checklist:
- Print or apply the underbase pass first, using firm, even pressure or the correct printer settings for white ink saturation.
- Flash to a tacky gel state, verified with an infrared thermometer rather than a visual guess.
- Print color passes on top of the flashed underbase, checking registration on the first few pieces before running the full batch.
- Run the final cure at full temperature and confirm dwell time against the ink or transfer’s spec, not just the display setting on the press.
Quality-control checklist:
- Pull two or three samples from every batch and check opacity under strong light for any garment color bleed-through.
- Run a scratch or adhesion test on a sample edge to confirm the ink or vinyl bonds properly to the fiber.
- Wash-test one sample on a normal cycle and inspect for cracking, fading, or dye migration before shipping the full order.
Troubleshooting Common Failures and How to Fix Them
Most dark-shirt printing problems fall into a handful of repeatable patterns, and each one has a specific cause rather than a vague “try again” fix.
- Muted or grayish colors almost always trace back to insufficient underbase opacity. Check your mesh count first; if it’s below 86, you’re likely underdelivering ink volume regardless of how many passes you run.
- White ink turning pink, yellow, or gray after a few days is dye migration, not a curing mistake. Confirm you’re using a low-cure, dye-blocking white on poly and blend fabrics, and retest your cure temperature against the ink manufacturer’s spec.
- Cracking at fold lines usually means either too many stacked underbase passes (each one adds stiffness) or an under-cured final layer that never fully gelled. Cut back to the minimum passes needed for opacity and verify surface temperature with an infrared thermometer during cure, not just oven or press dial settings.
- Visible white halo around design edges is a registration or choke problem. Reduce your underbase art size relative to the top-color layer and double-check press alignment on your first few pulls.
- Bleed-through at seams or high-stitch areas often means the underbase ink didn’t fully cure before the topcoat went down, so heat wasn’t reaching the full print area evenly.
Pro Tip: Keep a wash-tested sample from every job type you run, tagged with the exact mesh, ink brand, and cure settings used. When a failure shows up months later, that sample tells you in seconds whether it’s a process issue or a one-off fluke.
Durability and Care: What to Expect From Each Method
How long a print lasts depends more on cure quality than on which method you picked, but each technique has a realistic ceiling worth knowing before you promise a customer anything.
Done to trade standards, plastisol screen printing and DTF transfers both hold up to years of regular washing without significant cracking or fading, provided cure temperatures were verified and not just eyeballed. DTG on properly pretreated cotton lasts nearly as long but is more sensitive to harsh detergents and high dryer heat, since its ink layer sits thinner than a full plastisol underbase. HTV falls slightly below the others on longevity, mainly because vinyl edges are the first thing to catch on a zipper or rough surface and start peeling.
Care instructions that extend the life of any printed dark shirt:
- Wash inside-out to reduce direct friction on the printed surface.
- Use cold water and a gentle cycle, since heat is the primary accelerant for both cracking and dye migration on poly blends.
- Skip the dryer when possible, or use low heat; high dryer heat is one of the most common causes of delayed dye migration showing up weeks after a print looked perfectly fine.
- Avoid ironing directly on the print; iron inside-out or use a pressing cloth if the design needs touching up.
Cure testing and wash-sample pulls during production aren’t just quality theater. They’re the only reliable way to catch a bad cure profile before it turns into fifty customer complaints instead of one failed sample.
When to Hire a Pro and What Tekton LA Provides
DIY makes sense for one-off gifts and small test batches, but past a certain point, the math and the risk both favor a professional shop. Hire out when you’re running 25 or more units of the same design, when your art includes fine detail or gradients that a home setup can’t reproduce cleanly, or when you need a guaranteed wash-durability standard for a paying client.
Tekton LA runs DTG, DTF, screen printing, and embroidery in-house, alongside private label and woven label production for brands that need consistent results order after order. That range matters because it means a shop can match method to job rather than forcing every order through one process regardless of fit, and it operates with no minimum order quantity on blanks, which helps if you want to test a design before committing to a full production run.
Before handing a job to any printer, ask these questions:
- Can you run a physical sample before the full order?
- Do you wash-test samples, and can I see the results?
- What’s your realistic lead time for my quantity?
- Are there minimums, and do you offer private label options?
The One Habit That Separates a Reliable Shop From a Guessing Game
Every failure mode covered in this piece, muted color, dye migration, cracking, halos, traces back to a variable that wasn’t logged and therefore wasn’t controlled. A shop running the same mesh, ink, flash time, and cure temperature every single time on a given fabric type isn’t lucky. They’re just not guessing anymore.
The habit worth stealing, even for a one-person operation, is keeping a simple press log: mesh count, ink brand, flash time, surface temperature at cure, and squeegee pressure, tied to the fabric type it was used on. When a reorder comes in six months later, you’re not reconstructing settings from memory.
The simplest test for underbase opacity costs nothing: hold the printed shirt up to a bright light before you commit to a full run. If garment color shows through, fix the underbase now, not after fifty units are already pressed. Run the small test. It’s cheaper every single time.
— Christian
Get Dark-Shirt Prints Done Right, No Guesswork Required
Testing underbase opacity and dye migration yourself takes time most small brands don’t have, and one bad batch of a hundred shirts is an expensive way to learn a lesson. Tekton LA runs DTG, DTF, and screen printing in-house on quality blanks with no minimum order quantity, so you can order a sample run before committing to a full production job.

Start with a small batch on the Printers Shirt, a blank built for testing exactly the kind of opacity and cure questions this guide walks through, before scaling to a full order. If your brand is exploring garment-dyed options with more texture and depth, the Garment Dye Shirt line offers another dark-friendly base worth sampling. Tekton LA also supports private label runs and woven labels for brands that need consistent branding across every reorder, with fast turnaround built around Los Angeles production. Reach out for a quote and a sample run before your next print job goes to press.
Trade Resources Behind This Guide
The technical claims in this piece draw on established trade guidance rather than guesswork:
- Printable Press’s dark-shirt printing guide covers mesh selection, flash timing, and cure practice in detail.
- Graphics Pro’s screen printing tips offer practical, shop-tested advice on design and registration.
- Screen Printing Magazine’s ink comparison breaks down plastisol versus water-based performance on dark fabric.
- JenniferMaker’s sublimation workaround guide documents hobbyist-level HTV and sublimation hybrid techniques.
Sources
- How to print on dark t-shirts with white ink — Printable Press
- 7 tips for screen printing on dark T-shirts — Graphics Pro
- Plastisol vs. Water-based: Which Ink Is Best for Screen Printing? — Screen Printing Magazine
- How To Sublimate Dark Shirts And Cotton For Lasting Results — JenniferMaker