


Most woven labels fall between 0.5 inches and 2.5 inches wide, with a handful of dimensions covering nearly every use case. If you need a default to start designing against, use 50 x 25 mm (about 2 x 1 in) for an inside neck label. That said, placement, fold style, and how much detail your logo carries can all push you toward a different size before you finalize artwork.
TL;DR:
- Standard neck labels typically measure 50 x 25 mm, but larger sizes like 40 x 60 mm are better for wider logo layouts or higher-volume fabrics.
- Folding style significantly affects visible size, with center fold reducing the face to half the flat width and requiring design adjustments accordingly.
- Woven text should be at least 1.5 to 2 mm tall for readability, especially for serif fonts, and designs should be simplified to avoid weaving issues.
- Suppliers usually quote flat size, so understanding the difference between flat and finished dimensions is crucial for accurate ordering and design.
- Prototyping with paper mockups and requesting a 1:1 digital proof minimizes waste and ensures the final woven label matches expectations.
Table of Contents
- Woven Label Sizes: A Quick Chart By Use Case
- Choose Size By Garment And Placement
- How Fold Style Changes What’s Actually Visible
- Text Height, Fonts, and Proofing Before You Commit
- Material, Thread Density, and Finish Options
- From Spec Sheet To Sample: Ordering Without Waste
- How Tekton LA Supports Woven Label Production
- What Actually Matters When You’re Sizing A Woven Label
- Get Your Woven Labels Made Right The First Time
- Sources
Woven Label Sizes: A Quick Chart By Use Case
Before you send anything to a supplier, it helps to see the handful of sizes that cover almost every garment decision. Designers rarely need more than six or seven dimensions across an entire product line, and most brands settle on two or three that they reuse constantly.
Here’s a reference chart with typical finished sizes in millimeters and inches, plus where each one tends to show up:
One distinction trips up a lot of first-time buyers: the difference between finished size and flat size. Finished size is what you see once the label is folded and sewn into the garment. Flat size is the actual woven material before any fold happens, and it’s always larger. A label that finishes at 50 x 25 mm might start life as a 50 x 50 mm flat piece if it’s center-folded, because folding a label in half to hide the raw edge inside the seam cuts the visible height in half. Suppliers usually quote flat size on invoices, so if a number looks oddly large compared to what you specified, that’s probably why.
The most common fallback size across the apparel industry is the plain 50 x 25 mm neck label, mostly because it fits readable brand text, a small logo, and basic care instructions without crowding. When designers aren’t sure what to order, this is the size they default to, and reusing it across multiple garment types also simplifies inventory instead of juggling a different label spec for every SKU.
If you’re outfitting a whole product line, standardizing on two sizes (one for necks, one for side seams or hems) will save you more money over time than chasing a “perfect” custom dimension for every style.
Choose Size By Garment And Placement
The size chart gets you close, but placement and fabric weight are what actually decide the final call. Here’s how that plays out garment by garment.
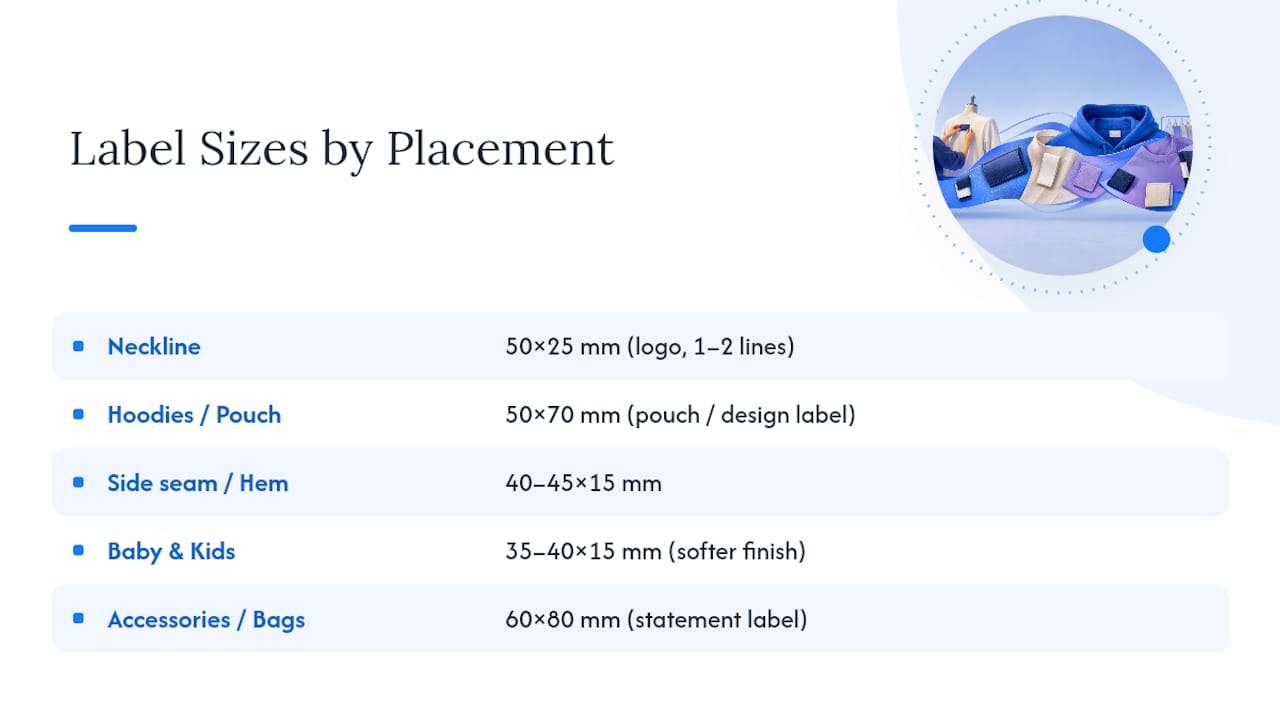
Inside the collar or neckline. This is the most visible, most touched spot on any garment, so comfort matters as much as branding. A 50 x 25 mm label handles a logo and one or two lines of text cleanly. If you want a wider layout with a logo on one side and care instructions on the other, a 40 x 60 mm size gives you the horizontal room without making the label feel bulky against the back of someone’s neck. A well-placed custom neck label is often the only branding touchpoint some customers will ever notice.
Hoodies and heavier fabric. Thicker material can swallow a small label visually, and it also tends to sit further from the skin, so you have more room to go bigger. Common choices include 50 x 25 mm, 60 x 20 mm, or 50 x 70 mm for a front pouch pocket label. The wider 50 x 70 mm option works well when brands want the label itself to function as a design element, not just a tag.
Side seams and hems. These spots reward a narrow, elongated shape because the visible sew line is thin. Sizes like 40 x 15 mm or 45 x 15 mm fit the geometry without puckering the fabric. Keep in mind the fold you choose here changes how much of that 15 mm height actually shows.
Baby and kids’ clothing. Comfort against sensitive skin takes priority over branding real estate. Smaller labels in the 35 x 15 mm to 40 x 15 mm range, paired with a softer finish or a printed tag instead of a stiff woven one, are the safer call for infant wear.
Accessories and bags. Tote bags, hats, and similar items can carry a bigger footprint since there’s no direct skin contact to worry about. A 60 x 80 mm label, or a fully custom statement label, gives you room for a wordmark, a tagline, or decorative border work that would look cramped on a garment.
How Fold Style Changes What’s Actually Visible
Flat size and visible size are not the same number, and the gap between them depends entirely on which fold style you pick. Getting this wrong is one of the most common (and most avoidable) mistakes designers make when ordering woven labels for the first time.
- Flat labels show the entire woven surface with no fold at all, usually sewn on with a border stitch. What you design is what you get.
- Center fold takes a flat label and folds it in half vertically, hiding the raw edges inside the seam. A 50 x 30 mm flat label folded this way produces two 25 x 30 mm visible faces, one on each side of the fold, so you’re effectively designing for half the width you started with.
- End fold wraps both short ends toward the back, which shortens the visible face on the sewn side while leaving the height untouched. This works well for narrow side-seam tags.
- Single fold (Manhattan fold) tucks just the top edge under, keeping most of the label’s surface visible while still finishing the top edge cleanly.
The basic formula to keep in mind: visible width equals flat width divided by the number of folded sections. If you’re ordering a center-folded label, design your artwork assuming only half the flat width is showing, and keep the most important text or logo mark centered in that visible portion, not near the fold line where it can get lost.
For placement, center fold and single fold both suit neck labels since the fold sits comfortably against the back of the neck. Flat labels tend to work better for side seams and decorative patches, where there’s no need to hide an edge inside a seam allowance.
Text Height, Fonts, and Proofing Before You Commit
Woven text has a physical floor. Below a certain height, individual threads can’t render clean letterforms, and the result is a blurred or broken shape instead of readable copy.
As a working rule, keep sans-serif text no smaller than about 1.5 to 2.0 mm in height, since text reliably weaves clean down to roughly 2 mm on standard equipment. Serif fonts need more room than that because their thin strokes and small feet are exactly the kind of fine detail woven thread struggles to hold at small scale.
A few practical rules for artwork that will actually weave well:
- Stick to bold, thick sans-serif fonts. Thin or hairline strokes tend to drop out or blur once woven.
- On a standard 50 x 25 mm label, plan for two lines of text maximum. A logo mark plus one line of brand name is usually the safer combination.
- If your design has three or more lines competing for space, drop the secondary line (size, care instructions, website) to a printed care tag instead of forcing it onto the woven label.
- Limit your color palette. Every additional thread color adds cost and increases the chance of registration issues on complex logos.
- Simplify logos with fine gradients, drop shadows, or thin outlines before sending them to weave. Flat, high-contrast shapes reproduce far more reliably.
Pro Tip: Always request a 1:1 digital proof before production, and print it out at actual size to hold against the garment. A logo that looks sharp on a monitor can look completely different printed at 25mm wide, and catching that on paper costs nothing compared to catching it on 200 finished labels.
Material, Thread Density, and Finish Options
Two labels can share identical dimensions and still look completely different once they’re woven, and the difference usually comes down to material and thread density.
Most woven labels use polyester damask or satin as the base weave. Damask has a tighter, more matte texture that holds fine detail well and feels slightly stiffer against skin, while satin has a glossier surface and a softer hand, which some brands prefer for labels that sit against bare skin at the neckline.
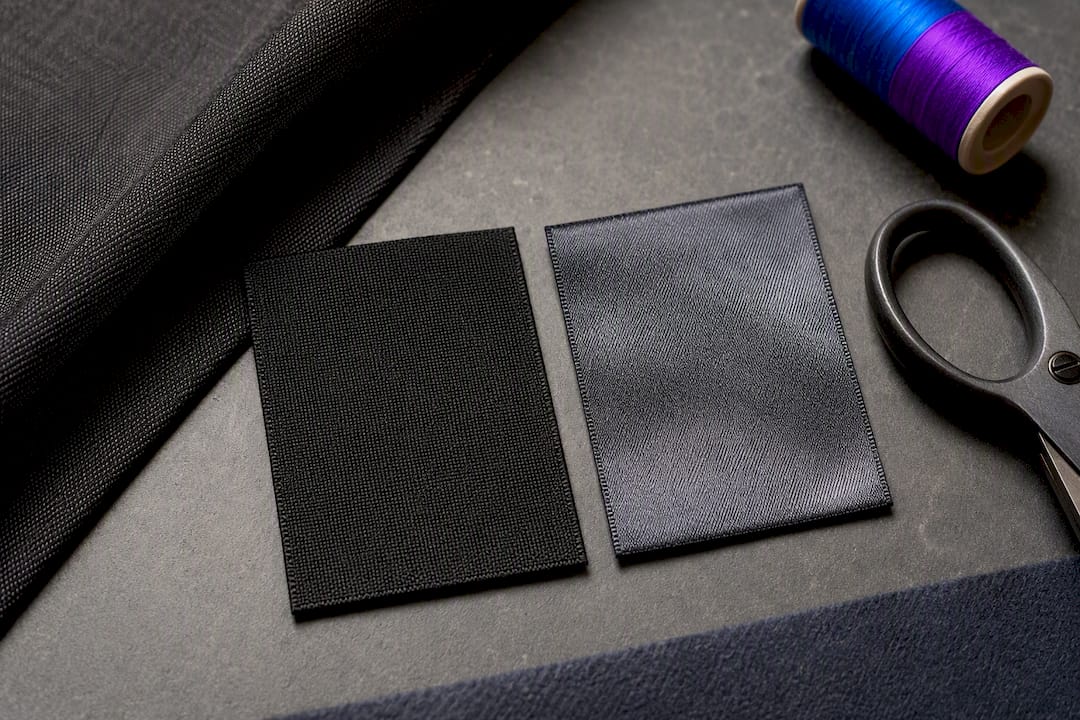
Thread density, measured in denier, is the other lever that controls detail. Lower deniers (around 50) produce a softer, thinner label but can lose crispness on intricate logos. Higher deniers in the 75 to 100 range hold sharper edges, which matters if your logo has fine lines, small text, or a lot of negative space that needs to stay clean.
Finish and application method matter just as much as the weave itself:
- Laser-cut edges give a clean, precise border without fraying, especially useful on smaller or irregularly shaped labels.
- Fold options (center, end, single) determine both the visible area and how the label sits against the seam, as covered above.
- Iron-on backing speeds up application for small production runs but tends to hold up less reliably through repeated washing than sewing.
- Sew-in is the standard for retail apparel and holds up best over the garment’s lifespan, though it requires a sewing step in production.
Washability varies by material and construction, and some suppliers publish specific limits, such as safe washing up to 90°C (194°F) for certain woven constructions. If sustainability matters to your brand, ask suppliers directly about OEKO-TEX certification or recycled-PET thread options. Not every vendor offers them, but demand has pushed more suppliers to add these as a standard line item on quotes.
From Spec Sheet To Sample: Ordering Without Waste
Getting from an idea to a finished label doesn’t have to involve guesswork or a big financial commitment, provided you follow a sequence instead of jumping straight to a bulk order.
Lead times for standard woven labels typically run one to two weeks once artwork is finalized, with rush options available from some suppliers for an added fee. Minimum order quantities vary widely across the industry, but low-minimum options exist, with some suppliers accepting runs as small as 5 to 100 pieces, which is a meaningful shift from the thousand-unit minimums that used to be standard.
Here’s a practical four-step way to prototype before committing budget:
- Build a 1:1 paper mockup. Print your label design at the exact flat size you’re considering and cut it out.
- Pin or tape it to the actual garment. Check it at the intended placement, whether that’s the inside collar, a side seam, or a hoodie pocket, and see how it looks and feels in context.
- Request a digital proof from your supplier. A 1:1 digital proof catches sizing and fold-visibility errors before anything gets woven, which is far cheaper than catching them after production.
- Order a small sample run. Confirm the physical label matches the proof, then move to your full order.
Before you request a quote, have this checklist ready for your supplier: flat size, finished size, fold style, thread colors, sewing/seam allowance, and desired finish (laser-cut, iron-on, sew-in). Supplying all of this up front avoids the back-and-forth that stretches out lead times.
Pro Tip: If you’re running multiple garment styles, standardize your neck label and side-seam label sizes across the entire line instead of customizing per style. Reusing the same two or three dimensions cuts setup costs and simplifies reordering later.
How Tekton LA Supports Woven Label Production
Tekton LA produces custom woven labels available in a range of sizes, built for brands that need flexibility on both dimension and order volume. This includes support for 1:1 digital proofs before production starts, so you can verify fold visibility, text legibility, and logo detail before committing to a run.
Low-minimum production is offered, which matters for small brands still testing a product line or refining branding before scaling up. Eco-material options are available for designers who want to source responsibly without adding a separate vendor relationship into the mix.
Broader printing capabilities, including DTG, DTF, embroidery, and screen printing, mean woven labels can be ordered alongside the garments they’re going on, keeping branding consistent across every touchpoint instead of coordinating multiple suppliers.
What Actually Matters When You’re Sizing A Woven Label
Most sizing guides treat this like a math problem: pick a width, pick a height, done. The actual variable that trips people up isn’t the dimension at all. It’s the fold. Designers spend hours perfecting a logo at a certain flat size, then get a finished label back at half the visible width because nobody accounted for a center fold before sending the file to production.
The conventional advice to “just measure twice” undersells the real fix, which is prototyping physically before you order anything. A paper cutout pinned to an actual hoodie tells you more in thirty seconds than any spec sheet will. It’s the cheapest insurance available in this entire process, and almost nobody does it.
If you’re a small brand trying to standardize across a product line, resist the urge to customize every label. Pick two sizes, one for necks and one for seams, and reuse them. Consistency saves more money over a year than a perfectly bespoke dimension ever will.
— Christian
Get Your Woven Labels Made Right The First Time
Tekton LA handles the part of this process that trips up most small brands: getting from a spec sheet to a finished label without wasted runs or guesswork. You get a 1:1 digital proof before anything goes into production, low-minimum orders so you’re not stuck buying a thousand labels to test a new size, and eco-material options if that matters to your brand’s sourcing story.

Since Tekton LA also handles DTG, embroidery, screen printing, and garment dyeing under one roof, your woven labels can ship alongside the actual garments they’re going into, whether that’s a garment-dye tee or a premium short-sleeve tee you’re already producing. That keeps your branding consistent without adding a second vendor relationship to manage.
Start by sending Tekton LA your garment type, placement, and rough size range. You’ll get sizing recommendations and a proof before you commit to a production run, so the first label you approve is the one you actually want on your product.
Sources
- Best Woven Label Size for Different Garments | Upper Labels
- Custom Woven Labels From 5 Pieces | Super Label Store