

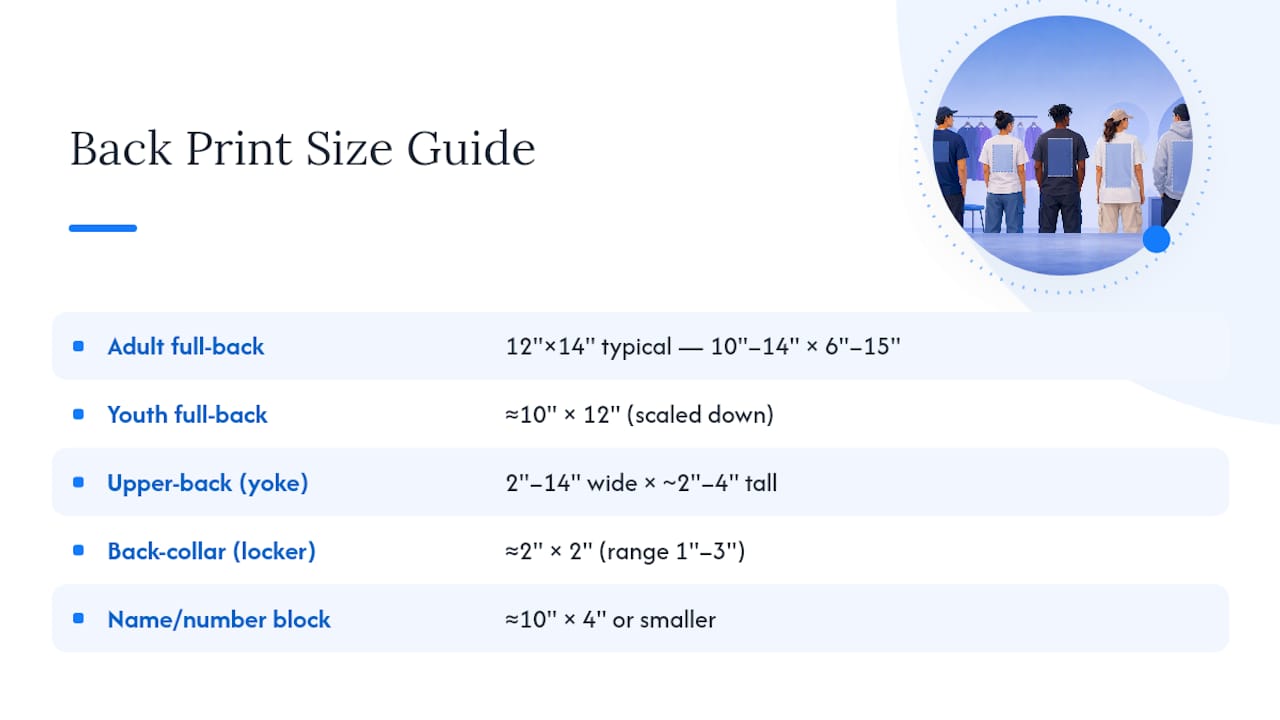
A standard full-back print runs 12" wide by 14" tall, positioned with the top edge 3–4" below the back collar seam. An upper-back mark typically measures 2–3" tall, centered under the collar. A back-collar or locker patch stays small: 1–3" square, sitting 1–2" below the seam.
Keep every element at least 1" from any seam or fold, and you’ll avoid the two most common reprint triggers in custom apparel: cropped designs and distorted placement.
That’s the short version. Here’s the reasoning behind each number, plus the file specs and placement math that keep a design looking right whether it’s printed on a men’s medium or a youth small.
- Full back: 12" × 14" default, top edge 3–4" below collar seam
- Upper back: 2–3" tall, centered horizontally under collar
- Back collar / locker patch: 1–3" square, 1–2" below seam
- Safety margin: minimum 1" clearance from all seams and the collar edge
Key Takeaways
A production-ready back print starts at 12" by 14" for adults, sits 3–4" below the collar seam, and requires 300 DPI files to hold detail at full size.
| Point | Details |
|---|---|
| Default full-back size | Use 12" × 14" for adult tees; scale to roughly 10" × 12" for youth garments. |
| Collar clearance | Start the top edge of a full-back design 3–4" below the collar seam. |
| Seam safety margin | Keep all critical design elements at least 1" from seams, collar, and hem. |
| File resolution | Build artwork at 300 DPI; a 12" × 14" file equals 3600 × 4200 pixels. |
| Test before full runs | Confirm sizing on a dressed sample and check both size extremes in a run. |
| Production partner | Tekton LA applies these same tolerances across DTG, DTF, and screen printing runs in its Los Angeles shop. |
Table of Contents
- What Is the Standard Back Print Size for a T-Shirt?
- How Do You Measure and Place a Back Print Correctly?
- Scaling Print Size Across Adult and Youth Runs
- File Prep: DPI, Pixel Dimensions, and Formats for Back Prints
- Avoiding Reprints: Common Mistakes and a Preflight Checklist
- Tekton LA’s Production Standards for Back Prints
- Where to Verify These Specs Yourself
- What Most Sizing Guides Get Wrong About Back Prints
- Get Production-Ready Back Prints Without the Trial-and-Error Runs
- Sources
What Is the Standard Back Print Size for a T-Shirt?
Full-back prints across the industry fall between 10" and 14" wide and 6" to 15" tall, but production shops rarely use the full spread. A 12" by 14" print has become the working default for adult tees, large enough to read from across a room but conservative enough to clear the side seams on a standard crew neck. Youth garments scale down to roughly 10" by 12", which keeps the design proportional to a smaller torso instead of swallowing it.
Some shops push the ceiling further. A 12" by 16" print area shows up frequently as the quoted maximum for full-front or full-back work, but most printers treat that as a limit to respect, not a target to hit. Going past 14" in height starts eating into the space you need for hem clearance, especially on fitted or cropped cuts. If you’re designing for an oversize or streetwear look, 13" to 15" wide by 14" to 16" tall is the range to work in, and you should expect to sample it before committing to a full run.
Upper-back placements, sometimes called yoke prints, behave differently because they’re built for subtlety rather than impact. Small brand marks in this zone commonly measure just 2 to 3 inches wide or tall. Think of the small script or icon you see between the shoulder blades on athletic gear. Wider upper-back panels, the kind that stretch shoulder to shoulder for a bold statement, can run 10" to 14" wide but stay compressed to about 4" in height so they don’t collide with a full-back design lower on the shirt.
Back-collar prints, often called locker patches because of their history in team athletics, are the smallest standard placement. Average sizing lands around 2" by 2", with a workable range of 1" to 3" square depending on how much detail the mark needs to hold. Name and number blocks, common on team jerseys, typically run about 10" by 4" or smaller, which leaves room above and below for a full-back logo if the design calls for both.
One factor that trips up a lot of first-time designers: garment cut changes what “standard” means. A boxy unisex tee gives you more usable back real estate than a tapered women’s fit, where the fabric curves in at the waist and the shoulder seams sit closer together. If your production run mixes cuts, don’t assume one size chart covers both. Confirm your ceiling dimensions against the tightest cut in the lineup, not the loosest.
How Do You Measure and Place a Back Print Correctly?
Placement consistency comes down to a handful of measurements applied the same way every time, not eyeballing it against the collar. Here’s the sequence most production shops follow:
- Lay the garment flat on a table or platen, back panel up, and smooth out any wrinkles at the shoulders and collar seam.
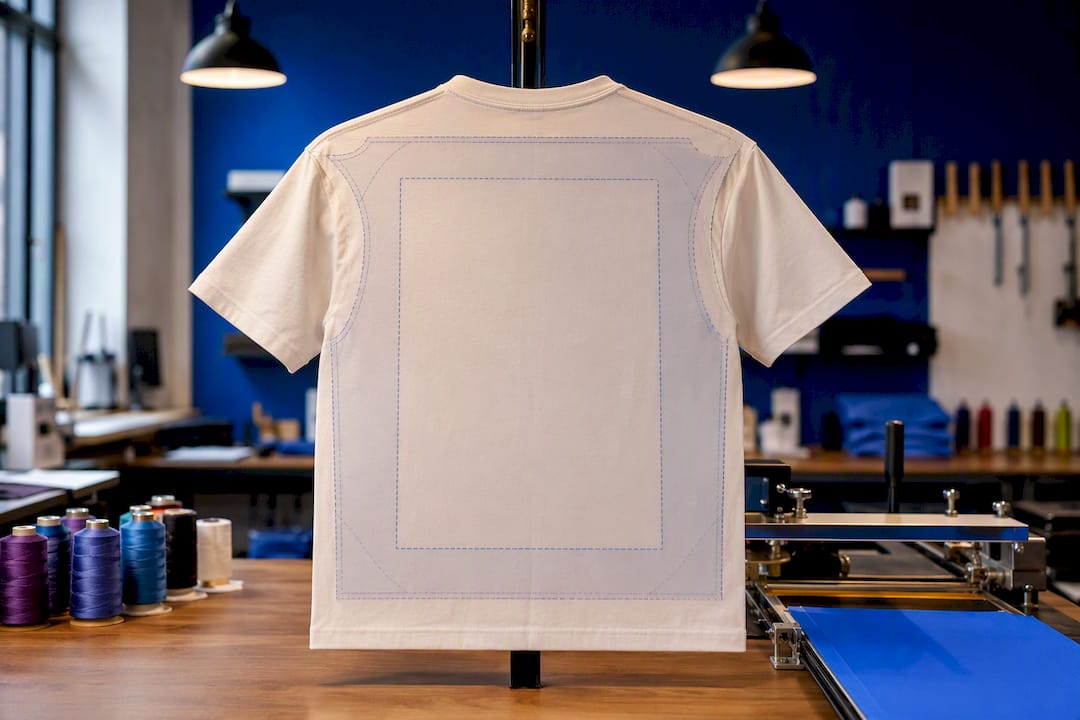
- Measure down from the collar seam, not the top of the fabric. Full-back designs start their top edge 3–4" below that seam, with 3" as the most common default.
- Center the design horizontally between the shoulder blades, using the side seams (not the sleeves) as your left and right reference points.
- Check vertical room below. For oversize prints extending past 14" tall, confirm you have enough hem clearance so the bottom edge doesn’t wrap toward the side seams as the shirt tapers.
- Mark small upper-back logos starting 1–2" below the collar seam rather than 3–4", since these marks read as accents, not focal points.
- Verify on a dressed sample, not just the flat garment. Fabric behaves differently once a body is inside it, especially around the shoulder blades and taper.
That last step matters more than most designers assume. A print measured perfectly flat can sit visibly higher once worn, because garment curvature shifts placement in ways a flat ruler won’t catch. Tapered cuts and curved-back panels are the usual culprits.
Seam clearance is the other rule that separates clean production runs from ones that need reprints. Keep every critical element of your design at least 1" from the side seams and the collar. For anything approaching the 14" to 16" height range, add extra clearance at the bottom too, since hems on some cuts curve upward toward the sides.
Pro Tip: Print a low-cost test transfer at your intended size and press it onto a scrap garment or even a pillowcase before running production. It costs a few dollars and catches placement errors that a screen mockup never will.
Scaling Print Size Across Adult and Youth Runs
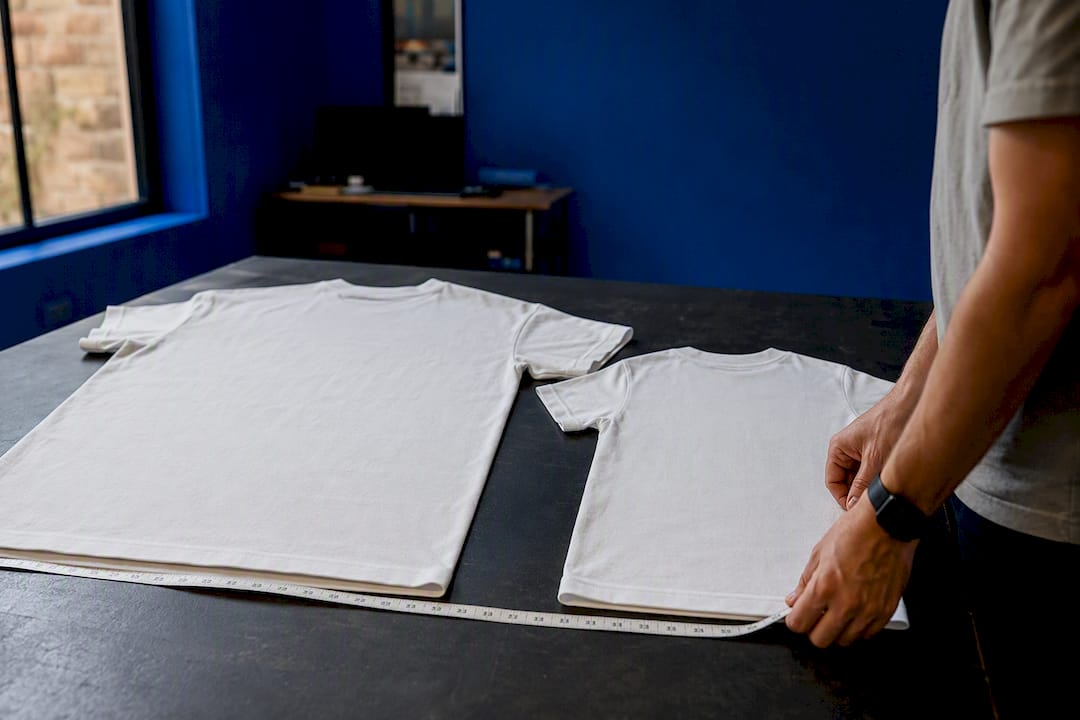
You don’t need a unique file for every size in a production run, but you do need a decision point for when one dimension stops working. A single shared print size is fine when the size range is tight, say S through XL in the same cut, because the visual proportion barely shifts. Once a run stretches from youth small to adult 3XL, a flat 12" by 14" file will look undersized on the largest shirt and oversized on the smallest.
The practical fix is proportional scaling anchored to two defaults: 12" by 14" for adult sizing, scaled down to roughly 10" by 12" for youth. That’s not an arbitrary cut. It mirrors the same ratio, so a logo that reads as balanced on a men’s medium reads the same way on a youth large instead of looking stretched or cramped.
- Use one shared dimension only when your size run is narrow (adult S–XL, for example).
- Scale proportionally, not by flat inches, when a run spans youth to 3XL or includes both fitted and boxy cuts.
- Anchor youth scaling to roughly 10" by 12" as the default, adjusting down further for toddler sizes.
- Test the extremes, not the middle. Print or mock up the smallest and largest garment in the run before finalizing a shared file.
That last point is where a lot of production mistakes get caught early. A mockup on a medium tells you almost nothing about how the design will sit on a 3XL or a youth small. Testing on the actual size extremes before the full run ships catches the proportion problems that flat measurements miss.
File Prep: DPI, Pixel Dimensions, and Formats for Back Prints
Build every back print file at 300 DPI. That resolution holds up under close inspection and doesn’t pixelate when a design gets pressed, printed, or embroidered at full size. The pixel math follows directly from the physical dimensions you’re targeting.
Vector formats, AI, EPS, and PDF, are the right call for line art, logos, and anything with hard edges or flat color fields, because they scale to any physical size without resolution loss. Raster art, meaning photos, textures, or hand-drawn illustrations, should come in as high-resolution TIFF or PNG files. Avoid heavily compressed JPEGs entirely. The compression artifacts that are invisible on a screen become visible printing flaws once the file is scaled to 12 inches or larger. Include a transparent background whenever the design needs to sit cleanly on a colored garment rather than a white rectangle.
Bleed isn’t usually a concern for on-body prints the way it is for paper printing, since there’s no trim edge to worry about. What matters instead is a safe interior margin. Keep critical content, meaning text, logos, or anything that needs to stay legible, at least 1 inch inside the file’s edges. That buffer protects against minor press misalignment and keeps the design readable even if placement shifts slightly between garments in a run.
Label every file clearly with its intended dimensions and placement, front or back, and don’t rely on a single combined file for both. Separate, clearly named files reduce the odds of a production mix-up when a shop is running multiple orders at once. For a deeper breakdown of color modes and naming conventions, Tektonla’s print file best practices guide covers the details that don’t fit here.
Pro Tip: Name your files with the physical dimensions built in, like “backprint_12x14_300dpi.png”. It sounds small, but it eliminates the guesswork when a design gets handed off between a designer and a print floor.
Avoiding Reprints: Common Mistakes and a Preflight Checklist
Three mistakes account for most back-print reprints: low-resolution artwork that pixelates at full size, designs placed too close to the collar or seams, and files that ignore how a specific garment cut or fabric shrinks after washing. Any one of these can turn a full production run into a redo.
Run through this checklist before a file goes to press:
- Confirm the physical dimensions match the garment cut and size range you’re printing.
- Check that pixel dimensions and DPI meet the 300 DPI standard for the target size.
- Mock up the design on a garment template, not just a flat canvas.
- Request a physical print or photo sample before committing to the full run.
- Confirm placement against a flat-measure diagram, marking the collar-seam offset in inches.
- Get final sample approval signed off before production starts.
Skipping that sample step is the single most avoidable cause of a reprint. A file that looks correct on screen can still land wrong once heat, pressure, or fabric stretch enter the picture.
Tekton LA’s Production Standards for Back Prints
Tekton LA builds every back-print job around the same tolerances covered here: a 12" by 14" default for adult full-back runs, 3–4" collar clearance, and 300 DPI file requirements before anything hits the press. Working out of Downtown Los Angeles, the shop handles DTG, DTF, screen printing, and embroidery on the same production floor, which means a design gets checked against real garment specs rather than a generic template. The printers shirt product page lists exact garment measurements for teams sizing a print against a specific blank before committing to a full order.
Where to Verify These Specs Yourself
For deeper pixel math and placement charts beyond this guide, see the DTF sizing calculator and screen print placement standards referenced above.
What Most Sizing Guides Get Wrong About Back Prints
Most sizing charts treat back print dimensions as fixed numbers you copy into a design file. That’s backwards. The inch ranges matter less than the logic behind them: clearance from the collar, proportion across a size run, and resolution that survives the jump from screen to fabric. A designer who memorizes “12 by 14” but skips the sample-approval step will still end up with a reprint.
The bigger gap I see in conventional advice is the assumption that one file works for every size in a run. It doesn’t, and pretending otherwise is how a design ends up looking stretched on a 3XL and cramped on a youth small. Proportional scaling between an adult and youth default isn’t optional if your run spans more than a couple of sizes.
If you take one thing from this guide, prioritize the collar-seam measurement and the sample check over chasing the “perfect” inch dimension. Printers who skip the physical sample are the ones calling for reprints two weeks later.
— Christian
Get Production-Ready Back Prints Without the Trial-and-Error Runs
Tekton LA is the alternative to guessing your way through sizing charts and hoping a mockup translates to fabric. Every full-back, upper-back, and locker-patch job runs through the same Downtown Los Angeles production floor, with sizing checked against the actual garment before your order goes to press, not against a generic template.

That matters most for small brands and teams that don’t have an in-house prepress person double-checking DPI and collar clearance on every file. Tekton LA’s team handles DTG, DTF, screen printing, and embroidery under one roof, and there’s no minimum order quantity on blanks if you want to test a size on a single sample shirt before committing to a full run. Start by browsing the printers shirt for a blank with published measurements, or head to Tekton LA to get a quote on your next back-print run.
Sources
- Artwork Size Calculator — DTF & Heat Press Sizing Guide | Turnkey Transfers
- Transfer Placement & T-Shirt Design Size Chart | DTF Station
- T-Shirt Design Size by Placement (+ DPI & File Specs)
- A Guide to Industry Standard for Screen Print Placements and Dimensions