

For a single detailed photo print, use DTG. For larger matching giveaways, screen printing tends to be more cost-effective. For small personalized batches or quick turnarounds, HTV or DTF gets you there fastest. Whatever the job, a professional shop like Tektonla adds real value through color-matched proofs and durable curing that DIY setups can’t match.
- One-off or photo-quality design: DTG
- 50+ units, one to three colors: screen printing
- Small batches, names, or numbers: HTV or DTF transfer
- Before you send artwork anywhere: build it at 300 DPI in CMYK to avoid delays
Key Takeaways
The right tote printing method depends on order size and design complexity, and cure time and file prep determine whether that print actually lasts.
| Point | Details |
|---|---|
| Match method to order size | Use DTG for one-offs and photo art, HTV or DTF for small personalized batches, and screen printing for 50+ units. |
| Get files to spec | Submit vector files for logos and 300 DPI raster files for photos, ideally in CMYK. |
| Budget for setup fees | Screen printing needs enough volume to offset per-color setup costs; DTG and DTF skip that fee but cost more per unit. |
| Respect the cure window | Wait 24 to 48 hours after pressing before the first wash to avoid early peeling or cracking. |
| Choose a flexible pro shop | Tektonla offers no-minimum blank orders, multiple print methods, and physical proofs for color-critical projects. |
Table of Contents
- Tote Bag Printing Methods and When to Use Each
- Which Tote Material Works Best With Each Method?
- What File Specs Do You Need for Tote Printing?
- How Much Does Tote Bag Printing Cost?
- Turnaround Times and Quality Checks to Expect
- How to Choose the Right Tote Printing Vendor
- Tektonla’s Approach to Tote Bag Production
- Where Should Your Design Sit on the Tote?
- Is Tote Bag Printing an Eco-Friendly Choice?
- Matching Your Budget and Use Case to the Right Setup
- What the Tote Printing Industry Gets Wrong
- Ready to Print Your Custom Totes?
- Sources
Tote Bag Printing Methods and When to Use Each
Every printing method pushes ink or vinyl onto fabric differently, and that difference shapes what your finished tote looks and feels like.
Screen printing forces ink through a mesh stencil, one screen per color. It gives you thick, opaque, long-lasting color that holds up to hundreds of washes, which is why screen printing pays off on larger orders once setup costs get spread across more units. DTG (direct-to-garment) sprays ink directly into the fibers like an inkjet printer, so it handles gradients and full-color photos that screen printing can’t reproduce economically. DTG works best for small runs since there’s no setup fee, though per-unit cost stays higher than screen printing at volume. DTF (direct-to-film) prints your design onto a film, then heat-presses it onto the bag, giving you photo-level detail with more durability flexibility across fabric types. Sublimation turns dye into a gas that bonds into polyester fibers, producing prints with zero hand feel, but it only works on polyester or poly-blend totes. HTV (heat transfer vinyl) cuts colored vinyl into your design and presses it on, making it the most accessible DIY method for personalization and one-offs.
- Under 25 units, simple text or logos: HTV or DTF
- Under 25 units, photo-quality art: DTG
- 25 to 100 units: DTF or screen printing, depending on color count
- 100+ units, one to four colors: screen printing
Pro Tip: Digital UV printing can cure instantly and works on tricky substrates, making it a smart middle ground when you need fast turnaround on unusual materials.
Which Tote Material Works Best With Each Method?
Your fabric choice locks in which printing methods will actually work, so pick the blank before you finalize the design.
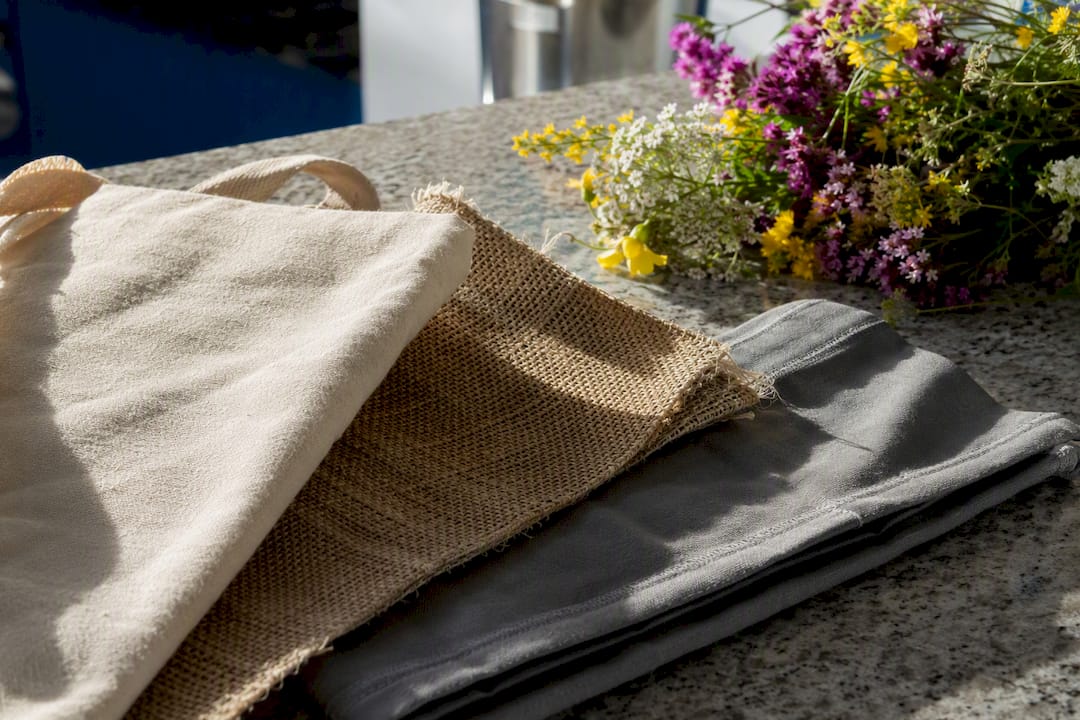
- Cotton or canvas (10 to 12 oz): the industry standard for most tote printing projects, and DTG performs best on 100% cotton because the fibers absorb ink evenly.
- Polyester: required for sublimation, since the dye needs synthetic fibers to bond with under heat. It won’t hold DTG ink the same way cotton does.
- Non-woven polypropylene: cheap, lightweight, and common for trade-show giveaways, though it prints best with screen printing or HTV rather than DTG.
- Jute: textured and eco-friendly looking, but its rough weave limits fine detail. Stick to bold, simple screen-printed designs.
Watch for surface sizing on cheap canvas blanks. It can cause ink to sit on top rather than absorb, and dye migration on some poly blends can bleed color into white ink over time. Order a sample and run it through a wash cycle before committing to a full batch.
What File Specs Do You Need for Tote Printing?
Sloppy artwork files are the number one reason tote bag orders get delayed. Vector files (AI, EPS, or PDF) print cleanest for logos and text because they scale to any size without losing quality. Raster files (PNG or TIFF) work for photos and detailed art, but only if they’re built at 300 DPI at final print size or larger.
- Submit CMYK files, or confirm with your printer how they handle spot and Pantone matching
- Build artwork at the exact print dimensions, not scaled up later
- Flatten transparencies and convert fonts to outlines before export
- Include 0.125 inch bleed on any design that runs to the edge
- Name files clearly (design name, color count, size) to avoid mix-ups
Statistic to remember: professional print shops treat 300 DPI as the minimum threshold for raster art. Anything lower prints blurry or pixelated once it’s blown up to a full tote panel. If you’re not sure your file qualifies, our print file best practices guide walks through the checks before you submit.
How Much Does Tote Bag Printing Cost?
Price comes down to five things: the blank itself, screen or setup fees, the number of colors, labor, and shipping. Screen printing carries an upfront setup charge per color, which is why it only makes financial sense once you’re ordering enough units to spread that cost out. DTG and DTF skip the setup fee entirely, so your per-unit price stays flatter no matter the order size, but that flat price sits higher than screen printing’s per-unit cost at volume.
Here’s roughly how that plays out, treating these as illustrative estimates rather than fixed quotes:
- 1 unit (DTG or DTF): highest per-unit cost, no setup fee
- 50 units (DTF or screen printing): per-unit cost drops noticeably, especially with one or two colors
- 500 units (screen printing): lowest per-unit cost once setup fees are spread across the full run, as bulk screen print orders typically demonstrate
Budget separately for proofs, physical samples, rush fees if you need a fast turnaround, and packaging if the totes are shipping straight to an event or retail shelf.
Turnaround Times and Quality Checks to Expect
- Sample proofs: typically a few business days, faster with digital proofs, longer if you request a physical sample.
- Small runs (under 100 units): usually one to two weeks depending on the method and current shop volume.
- Bulk orders (500+): plan for longer lead times, especially with multi-color screen printing.
- Post-press wait: most printers recommend a 24 to 48 hour cure period before the first wash, giving ink or adhesive time to fully set into the fabric.
- Fulfillment: ask whether the shop offers dropship or kitting, since that affects both cost and how the totes reach your final destination.
How to Choose the Right Tote Printing Vendor
Not every print shop handles every job well, so vet vendors before committing your budget.
- Ask about minimum order quantities. No-minimum shops give you flexibility for testing designs before scaling up.
- Request a physical sample proof, not just a digital mockup, especially for color-critical brand work.
- Ask directly how they handle Pantone or spot color matching.
- Confirm turnaround time in writing, including rush options.
- Ask about sustainability practices if that matters to your brand.
Red flags: no sample policy, vague answers about file specs, or slow and inconsistent communication before you’ve even placed an order.
Pro Tip: If your project involves a retail-ready product, complex multi-color art, or a hard deadline, hiring a professional shop almost always costs less in the long run than fixing a botched DIY batch.
Tektonla’s Approach to Tote Bag Production
Tektonla runs DTG, DTF, screen printing, and embroidery out of Downtown Los Angeles, with no minimum order quantities on blanks. That flexibility means you can order one sample tote to test a design or scale straight into a 500 unit run without switching vendors mid-project.
- Multiple print methods under one roof, so the method fits the job instead of the job bending to the shop’s equipment
- Physical proofs and color matching before full production runs
- Private label and woven label options for brands building a retail line
- Eco-friendly practices, including locally sourced materials and garment dyeing
- Live printing events across California for experiential marketing and pop-ups.
Where Should Your Design Sit on the Tote?
Print placement affects both how a design reads visually and how it survives daily use. The most common zone is the center front panel, typically 10 to 12 inches wide and 10 to 12 inches tall on a standard 15 by 16 inch tote, which gives a bold design plenty of visibility without crowding the seams.
A bottom-corner placement, usually 4 to 5 inches square, works well for minimalist branding or a small logo that doesn’t need to dominate the bag. Full-panel prints that run edge to edge look dramatic but require careful handling around the side seams and handles, since fabric puckering near stitching can distort a design during pressing. Some totes support printing on the gusset (the side panel) or even the back, which is useful for adding care instructions, a second logo, or a QR code without cluttering the front.
Whatever placement you choose, keep your design at least half an inch away from any seam or handle attachment point. Ink applied too close to a seam can crack over time as the fabric flexes, and heat-pressed vinyl near a seam is especially prone to lifting at the edge. If you’re printing on both sides, confirm with your shop whether that changes turnaround or pricing, since some methods require a second full press cycle rather than a simultaneous print.
For text-heavy designs, keep the smallest font size proportional to the print method. Screen printing holds fine detail well, but very thin lines can fill in with ink on rougher canvas weaves. DTG and DTF reproduce fine text more reliably, which matters if your design includes small print like a website URL or care instructions.
Is Tote Bag Printing an Eco-Friendly Choice?
Totes exist largely as an alternative to single-use plastic bags, so the sustainability story matters to a lot of buyers ordering them. The fabric you choose drives most of the environmental impact. Cotton and canvas are biodegradable and reusable for years, while jute is a fast-growing crop that requires relatively little water compared to cotton farming. Non-woven polypropylene, by contrast, is a petroleum-based plastic that doesn’t biodegrade, even though it’s often marketed as a “reusable” alternative to plastic bags.
Printing method matters too. Screen printing with water-based or discharge inks produces less waste than plastisol, and DTG typically uses water-based inks by default, which cuts down on the solvents involved in some transfer processes. Sublimation and DTF both rely on transfer films, which create some material waste per unit compared to direct-application methods.
Sourcing also plays a role that’s easy to overlook. Locally produced blanks cut down on shipping emissions compared to overseas bulk imports, and garment dyeing on demand reduces the excess inventory that gets discarded when brands overorder colors that don’t sell. If sustainability is a priority for your order, ask your printer directly about ink type, blank sourcing, and whether they offer organic or recycled cotton options. For a broader look at how different bag materials stack up environmentally, this overview of eco-friendly bag types breaks down the trade-offs across several common substrates.
Matching Your Budget and Use Case to the Right Setup
The right combination of method and material depends on what the tote is actually for, not just what looks best in a mockup. A retail product meant to sell on a shelf needs a durable print, likely screen printing on 10 to 12 oz canvas, plus a clean hang tag and consistent color matching across every unit. A conference or trade-show giveaway ordered in bulk usually favors screen printing on non-woven or lightweight cotton, since the priority is low cost per unit over long-term durability.
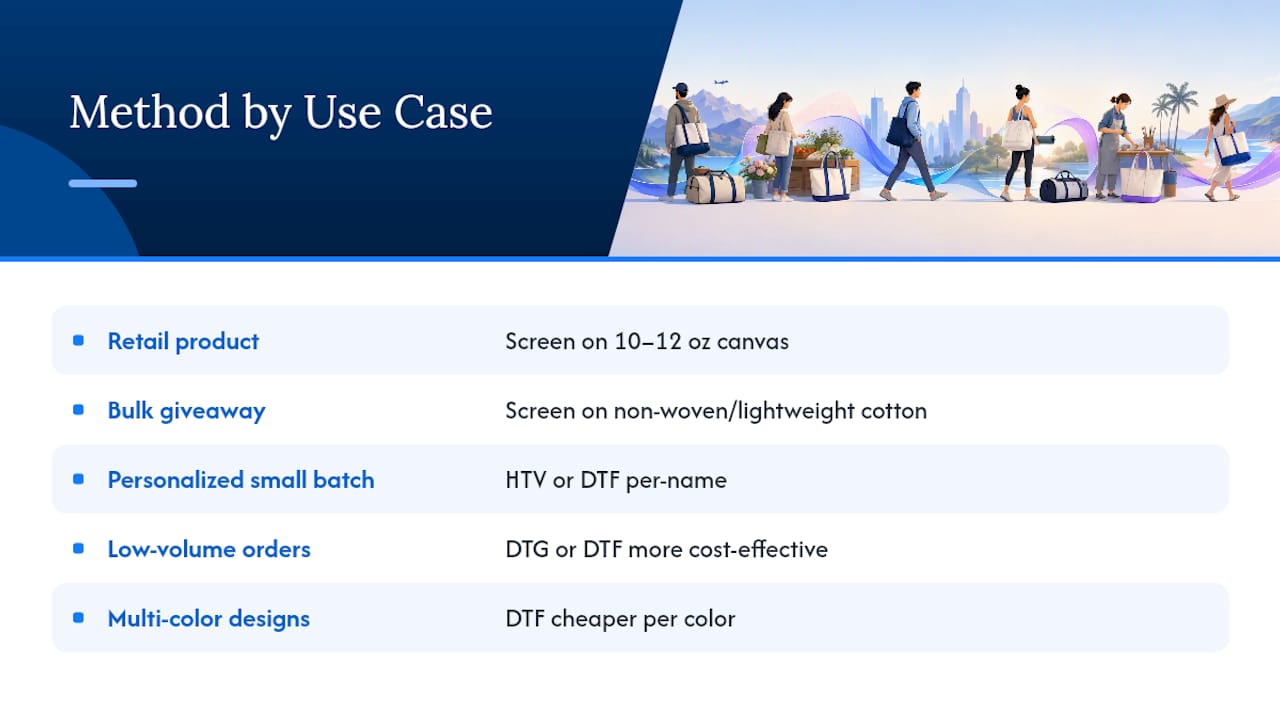
A small batch of personalized totes, like wedding party gifts with individual names, works well with HTV or DTF, since each one might need a slightly different design without triggering a new screen setup.
Buyers ordering relatively few units may find DTG or DTF more cost-effective since screen printing setup fees are less justified at low volume. Once you cross into the low hundreds, run the math on both options. For designs with multiple colors, DTF may be more cost-effective compared to screen printing, which charges setup fees per color. When quality and brand consistency matter more than unit cost, such as a flagship retail item, it’s worth paying for the physical proof and color-matched screen print run even at moderate volumes.
What the Tote Printing Industry Gets Wrong
Most guides treat printing method choice like a checklist matched purely to order size, and that misses half the picture. Order size matters, but design complexity and how the tote will actually be used matter just as much. I’ve seen buyers push a photo-quality design into screen printing because they assumed bulk automatically meant screen print, then get disappointed when gradients and fine shading came out flat and blocky.
The bigger blind spot is file prep. Buyers spend weeks picking a method and material, then submit a low-resolution logo pulled from a website, and wonder why the proof looks rough. Getting your file to 300 DPI in the right color space matters as much as any method decision.
The other thing conventional advice underplays: cure time. Skipping the 24 to 48 hour wait before the first wash is probably the single most common reason a “durable” print peels early, and it costs nothing to just wait. If you take one thing from this guide, prioritize getting your artwork specs right and giving the print time to set before you judge the quality. Everything else, screen versus DTG versus DTF, is a secondary decision that a good printer can help you make on the spot.
— Christian
Ready to Print Your Custom Totes?
Tektonla runs DTG, DTF, screen printing, and embroidery out of one Downtown Los Angeles shop, with no minimum order quantities on blanks. That means you can order a single sample to test your design before committing to a bulk run, instead of getting locked into a vendor’s minimum before you’ve even seen a proof.

Whether you’re printing one detailed tote for a personal project or scaling a 500 unit retail order, Tektonla handles proofs, color matching, and cure timing so the finished bags hold up past the first wash. If you’re ready to move forward, check out the printers shirt product line for an example of the print quality you can expect, or head to Tektonla’s site to upload your artwork and request a quote today.