


Use 3 to 4 inches wide, centered over the pocket area, placed 7 to 9 inches down from the shoulder seam on most adult garments. That single spec covers the majority of tees, polos, and button-downs you’ll ever spec for a client or your own line. Push toward 4.5 inches only if you’re printing, since that’s the practical ceiling for embroidery once you factor in standard hoop dimensions.
A few adjustments matter before you send a file to production:
- Embroidery generally runs smaller than screen print or DTG. A 3.75-inch design is the common sweet spot for stitched logos, not the full 4-inch print maximum.
- Hoodies and jackets can handle 4 to 4.5 inches and often need a slightly different vertical offset because of collar bulk and hood seams.
- Fitted women’s tees and youth sizes should shift down to 6 to 8 inches from the shoulder seam, with narrower widths to match the smaller chest panel.
Quick reference: 3 to 4 inches wide, 7 to 9 inches down, 4.5-inch hard ceiling for embroidery. Everything else in this guide explains why those numbers exist and where they need to flex.
Key Takeaways
Correct left chest sizing depends on matching garment type, decoration method, and vertical placement to the standard 3 to 4 inch, 7 to 9 inch down formula.
| Point | Details |
|---|---|
| Default size range | Use 3–4 inches wide for most adult garments, centered over the pocket area. |
| Vertical placement | Measure 7–9 inches down from the shoulder seam for adults; 6–8 inches for women’s and youth. |
| Embroidery ceiling | Cap embroidered designs at 4.5 inches wide due to standard 12–15 cm hoop limits. |
| Garment-specific sizing | Push hoodies and jackets to 4–4.5 inches; scale youth designs down to 3 inches. |
| Order with Tekton LA | Submit vector artwork, placement in inches, and garment type for DTG, DTF, screen print, or embroidery production. |
Table of Contents
- Left Chest Print Size Recommendations by Garment Type
- Why Embroidery Sets a Lower Size Ceiling Than Print
- How to Measure and Place a Left Chest Print Correctly
- [Design Orientation and Artwork Details That Change Ideal Sizing are key considerations when adapting artwork for different garment panels and scale; see our guide on how board graphics influence clothing for designer-focused insights.](#design-orientation-and-artwork-details-that-change-ideal-sizing-are-key-considerations-when-adapting-artwork-for-different-garment-panels-and-scale-see-our-guide-on-how-board-graphics-influence-clothinghttpscztrocksblogsnewshow-board-graphics-influence-clothing-for-designer-focused-insights)
- Testing Placement Before You Commit to a Full Run
- Common Left Chest Sizing Mistakes and How to Fix Them
- Tekton LA’s Setup Checklist for Left Chest Orders
- Sources
Left Chest Print Size Recommendations by Garment Type
Garment shape changes everything about how a logo reads once it’s worn, not just how it measures on a flat table. A 4-inch design on a boxy hoodie panel looks proportional. The same 4-inch design on a fitted women’s tee can look like it’s swallowing the shoulder.
That 3.5-inch baseline for adult tees isn’t arbitrary. It’s the width where most left-chest logos stay legible without dominating the panel, and it gives you enough real estate for a wordmark plus a small icon without crowding the seam.
A few production notes that matter more than the raw dimensions:
- Simplify artwork before you shrink it. A logo with fine gradients or hairline strokes falls apart at chest scale even if the width is technically correct.
- Text needs to hold up at the final size, not just look fine on your monitor at 400% zoom.
- When in doubt on a youth order, size down rather than up. A logo that looks slightly small reads as intentional; one that overwhelms a kid’s small chest reads as a mistake.
If you’re speccing uniforms across a roster with mixed sizes, the ranges above are your anchor points. Our team logo placement guide walks through how to scale one master design across youth through adult 3XL without redrawing it each time.
Why Embroidery Sets a Lower Size Ceiling Than Print
Embroidery has a hard physical limit that print methods don’t: the hoop. Most commercial embroidery machines run 12 cm or 15 cm hoops, which works out to roughly 4.7 inches at the outer edge. Once you account for the stitch clearance a digitizer needs inside that ring, 4.5 inches becomes the practical maximum for a standard left-chest job.
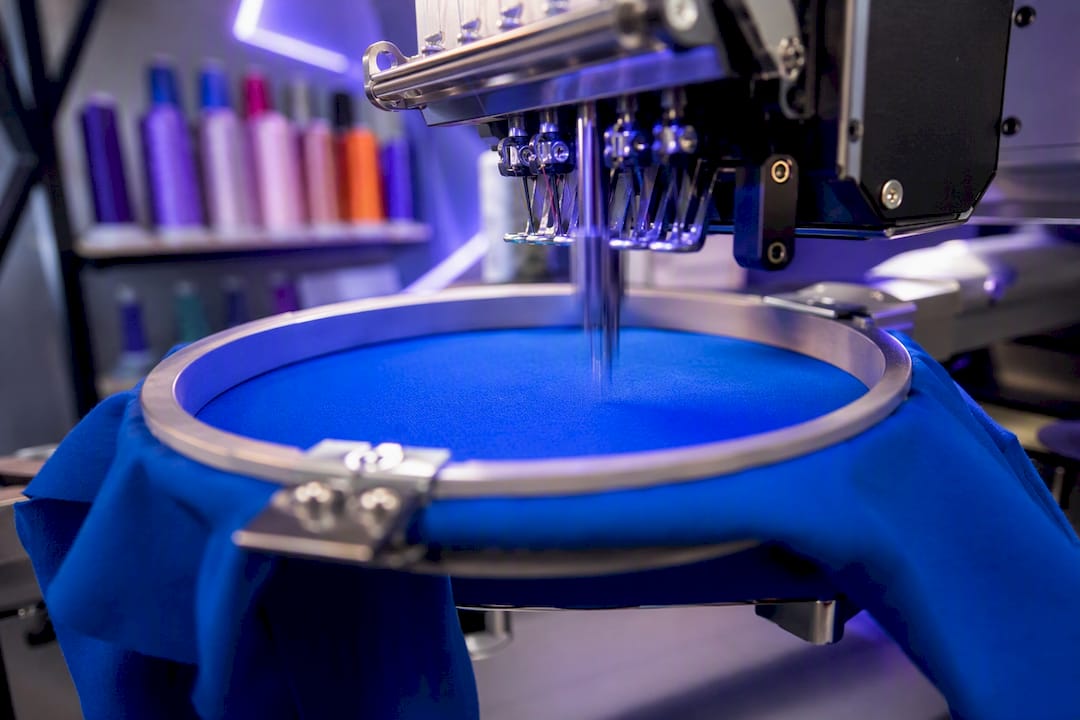
Go bigger than that and you’re not just resizing artwork. You’re switching to a jacket or back hoop, which usually means a different machine setup, more time on the frame, and a higher price per piece.
Stitch density creates its own ceiling separate from hoop size. Small text and thin lines that look crisp in a vector file can turn into a blob of thread once they’re digitized at 3 inches wide. A digitizer has to either simplify the detail or bump the design up in size to keep it readable, which is why reducing embroidery designs by about 10 to 15 percent from the print version is standard practice, not a shortcut.
A few things worth flagging before a design goes on the frame:
- Thin strokes below a certain narrowness often vanish or fill in once stitched, so thicker strokes or simplified designs are preferable.
- Very small text typically does not digitize well; consider omitting or moving it to less visible areas.
- Performance and stretch fabrics need a stabilizer backing, or the stitches pucker and the fabric distorts around the design after a few washes.
Pro Tip: Ask for a digitizing proof before you commit to a production run, especially on new artwork. A five-minute look at a stitch simulation catches problems that are expensive to fix after 200 pieces are already sewn.
How to Measure and Place a Left Chest Print Correctly
Center the design over the pocket area, not the literal middle of the chest. That distinction is where most placement mistakes start.
Here’s the sequence a decorator actually follows on a flat garment:
- Find where the shoulder seam meets the collar. That’s your reference point, not the collar itself.
- Measure down a moderate distance from the shoulder seam for adult unisex sizes, and slightly less for fitted women’s and youth cuts.
- Measure in from the center front placket, landing the design’s horizontal center about 4 to 6 inches from the garment’s vertical midline.
- Mark that intersection point and center your design over it, using the design’s visual weight rather than its bounding box if the artwork is asymmetrical.
A more reliable variation on this method uses intersecting lines drawn from the right side of the collar and the bottom of the armpit. Where those two lines cross is your placement point, and it self-corrects for garment size in a way that fixed inch measurements alone don’t.
One thing that trips up even experienced designers: a shirt lying flat on a table lies to you. A design that looks perfectly centered on a folded 2XL can shift noticeably once the shirt is filled out on a body, because the extra fabric width changes how your eye reads the placement. Always check placement on a hanger or a body form before finalizing, not just on a flat surface.
Design Orientation and Artwork Details That Change Ideal Sizing are key considerations when adapting artwork for different garment panels and scale; see our guide on how board graphics influence clothing for designer-focused insights.
A horizontal wordmark and a tall vertical badge don’t scale the same way, even at the same “size.” Horizontal artwork can run closer to the full 4-inch width because the height stays contained within the chest zone. A vertical mark needs the opposite treatment: keep the width narrower so the design doesn’t creep toward the armpit or wrap around the side seam as the height grows.
Embroidery compounds this. Because stitch coverage needs more visual weight than ink to read clearly, embroidered versions of a design typically run 10 to 15 percent smaller in overall footprint than the print version of the same logo, even though the placement coordinates don’t change.
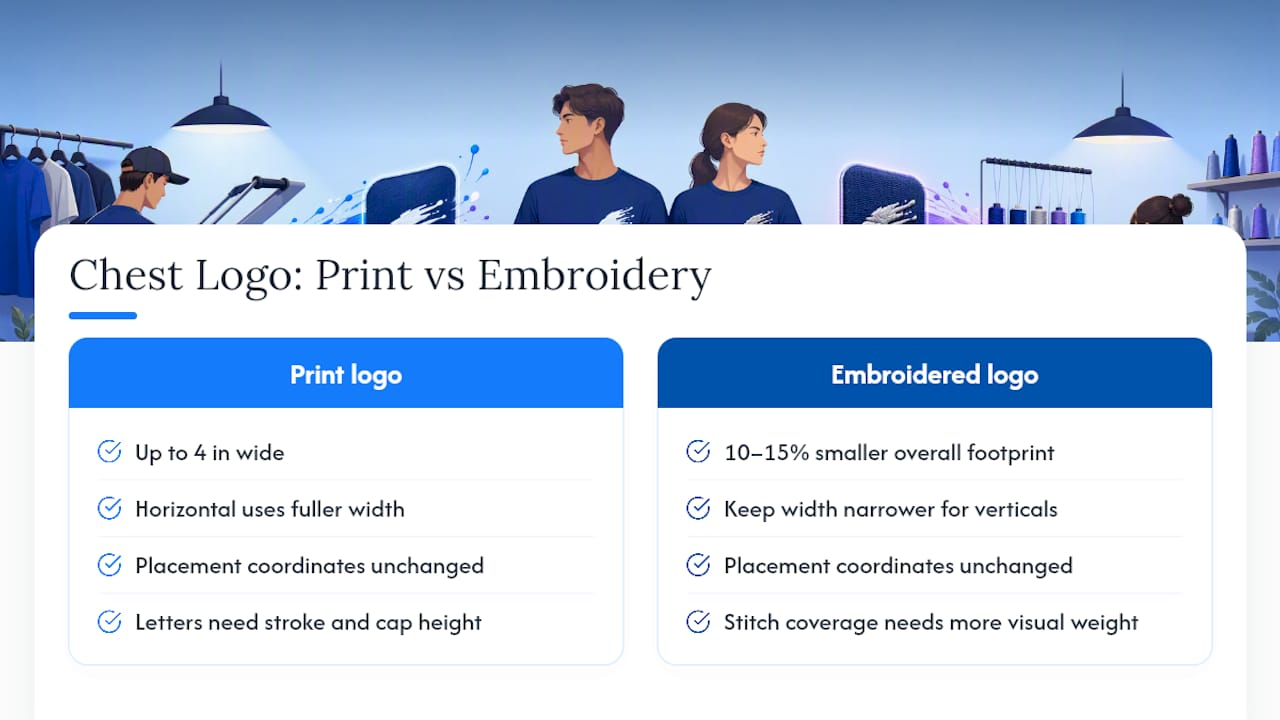
Text legibility has its own floor regardless of orientation. Letters need enough stroke weight and cap height to survive both the print process and a few wash cycles without the fine edges blurring together.
Pro Tip: If your primary logo has fine detail, gradients, or small type, build a second simplified version specifically for chest placement. Trying to force the full brand mark into 3.5 inches usually costs more in cleanup than just designing a dedicated small-scale variant from the start.
Testing Placement Before You Commit to a Full Run
Vendor placement templates are a fast starting point, but they assume a “standard” body shape that doesn’t always match your actual garment. Measuring directly on a flat sample from the shoulder seam is more reliable whenever you’re working with an unusual cut, like a drop-shoulder tee or a garment-dyed style with a nonstandard collar.
Before a design goes into full production, run through this short checklist:
- Print or stitch a scale test on one sample piece, not the whole run.
- Review a digitizing proof if the job is embroidered.
- Check the physical sample on a true medium, since that’s the size most placement guides are calibrated against.
- If the order includes women’s cuts, pull a separate fitted sample. Sizing that works on a unisex medium doesn’t always translate.
When a logo has asymmetrical elements, center the design’s visual balance point over the pocket area rather than centering its literal bounding box; a lopsided mark can look off-center even when the math checks out. For any new artwork or an unfamiliar garment, ask for a placement proof or a physical sample shirt before the full order ships. It’s a small delay that catches the mistakes worth catching early.
Common Left Chest Sizing Mistakes and How to Fix Them
The same handful of errors show up on repeat orders more than any other placement issue:
- Placed too low: the design reads as an armpit print once the shirt is worn. Fix: move it up 1 inch and re-check against the shoulder seam measurement.
- Sized too large for the garment: especially common on smaller adult sizes and youth cuts. Fix: drop to the lower end of the recommended range for that size.
- Printed over a pocket or zipper: keep at least 1 inch of clearance from zipper teeth and pocket seams.
- Skipping stabilizer on stretch fabrics: leads to puckering after a few washes. Fix: always request a stabilizer backing for performance blends.
Before committing to a full production run, test the final placement on a 2XL sample. Larger sizes stretch the fabric differently, and a design that looked centered on a medium can shift visually once it’s on a bigger body.
Tekton LA’s Setup Checklist for Left Chest Orders
A clean order form saves more production headaches than any single design decision. Send vector artwork (AI, EPS, or SVG) whenever possible, plus a print-ready raster file at 300 DPI minimum for anything going to DTG or DTF. For screen print jobs, flag your color separations up front so setup doesn’t stall waiting on file corrections.
A spec sheet that covers these fields gets your order into production without back and forth:
- Garment type and size range (referencing something like our printers shirt or polo as a base)
- Placement in inches, measured from the shoulder seam
- Final artwork width and height
- Decoration method: DTG, DTF, screen print, or embroidery
- Special instructions: stabilizer needed, pocket or zipper clearance, digitizing proof requested
Pro Tip: If you’re not sure which method fits your artwork, mention the design’s fine detail level on the order. Fine gradients steer toward DTG or DTF; bold, simplified marks with two or three colors are often better suited to embroidery or screen print. Our guide on print file best practices covers file prep in more depth if you’re setting up your first order.
Subtlety vs. Statement: Choosing Your Scale
Corporate and uniform programs usually read better with restraint. Aim for the smaller end of the range and let the garment carry the brand quietly. Streetwear and fashion drops can push toward the maximum and make the logo part of the design itself. Test both against your actual brand guidelines before locking in a size.
Ready to Put These Specs Into Production
You now have the measurements. What you don’t need is to spend another afternoon guessing whether your digitizing proof will hold up or whether that 4-inch logo will actually fit your hoodie order. Tekton LA runs DTG, DTF, screen print, and embroidery in house in Downtown Los Angeles, with sample proofing available before you commit to a full run, so the sizing decisions in this guide get tested on real fabric before they’re locked in.

To get started, send your artwork file, desired placement in inches, garment type, and quantity. If you need a blank to build on, our garment dye shirt is a popular starting point for small brands speccing their first left-chest run. Check current garment options and place your order at Tekton LA.
Sources
- Left chest embroidery placement guide | standard sizes & charts
- Embroidery hoop sizes in centimeters — complete guide with conversion charts
- Left chest shirt printing placement
Consult digitizing and hoop-size guidance directly with your embroidery provider before finalizing any design that pushes close to the 4.5-inch maximum.