


Start with a heat-press hover at roughly 230–250°F (110–120°C) for 60–90 seconds if you’re running low volumes. Move to a curing oven set to about 212–230°F (100–110°C) for 2–3 minutes once you need repeatable batches. Either way, check your work the same way: pull the film out and look for a smooth, matte-to-slight-gloss surface with no grain and no tackiness. That single visual cue tells you more than any dial setting.
TL;DR:
- For batch curing, a conveyor dryer set to 212–230°F (100–110°C) for 2–3 minutes provides the most even and repeatable results.
- Hovering with a heat press at 230–250°F (110–120°C) for 60–90 seconds can suffice for low volumes but requires a steady hand to maintain consistent gap spacing.
- Always verify temperature with an infrared thermometer and inspect the surface for a smooth, matte-to-glossy finish to ensure proper curing, not relying solely on dial settings.
- Overcure results in brittle, shiny, or yellowed edges, while undercure causes a grainy, tacky surface and weak adhesion, so adjusting time and temperature based on visual cues is crucial.
- Proper storage of powder in airtight containers with desiccants and maintaining low humidity improves curing consistency and quality.
Table of Contents
- What Equipment Actually Cures DTF Powder?
- How Do You Cure a DTF Transfer Step by Step?
- What Are the Right DTF Curing Temperatures and Times?
- How Do You Diagnose Undercure and Overcure Problems?
- What Storage and Safety Steps Protect Curing Quality?
- How Tekton LA Approaches DTF Curing in Production
- Why Consistency Matters More Than Perfection
- Want Production-Ready Transfers Without Building a Curing Setup?
- Sources
- FAQ
What Equipment Actually Cures DTF Powder?
Every DTF shop eventually picks a lane between four methods, and the right one depends on how many transfers you’re pushing per day, not what looks impressive in a shop photo.
A curing oven or conveyor dryer surrounds the film with heat from all sides, which is why it gives the most even, repeatable results for batch runs. Set it to about 100–110°C (212–230°F) for 2 to 3 minutes, and it also frees your heat press to do actual pressing instead of sitting idle over powder.
A heat press used for hovering works fine at low volume, but it demands a steadier hand. You’re holding the platen a fraction of an inch above the film, and inconsistent gap distance is the most common reason hover-cured transfers turn out patchy.
Shaker ovens and flash dryers speed up the powder-and-melt step but run hotter zones near the heating element, so edges can overcure while the center lags. A heat gun works in a pinch for spot repairs, never for volume.
Before you cure anything, gather:
- A powder shaker or shaking box
- Silicone or Teflon cover sheets
- An infrared thermometer
- Ventilation or an exhaust setup
- Flat curing trays or a mesh conveyor belt
Industrial shops sometimes use UV LED curing to separate the melt phase from a rapid light-triggered cure, but that method depends on specially matched photoinitiator chemistry and isn’t something a small shop can replicate with standard DTF powder.
How Do You Cure a DTF Transfer Step by Step?
The process is short, but skipping any single step is how shops end up with a stack of half-cured transfers they can’t sell.
- Shake off excess powder. Tilt and tap the film so only the printed area holds adhesive. Loose powder outside the design causes uneven melting and wasted material.
- Preheat your equipment fully. Don’t trust the display. Check the actual surface with an infrared thermometer, since digital readouts often run several degrees off from true platen or oven temperature.
- Position the film powder-side up and protect it with a silicone or Teflon sheet if you’re hovering with a press.
- Apply heat for your method’s window: hover the press without contact, or run the sheet through the oven at the settings above.
- Inspect immediately. Look for that smooth, matte-to-slight-gloss finish. Grainy or shiny-wet spots mean it needs more time.
- Cool completely before handling, then run a quick stretch and single-wash test on a sample before you commit a full gang sheet to the same settings.
Pro Tip: Run a “ladder test” the first time you dial in a new powder brand: cure four identical swatches at 15-second intervals and compare peel resistance after cooling. That five-minute test saves you from ruining an entire production run on guesswork.
What Are the Right DTF Curing Temperatures and Times?
These numbers are starting points, not gospel. Every powder formula reacts a little differently, so treat this table as your first ladder test, then adjust based on what you see and feel.
A curing oven’s even heat distribution is why most of the DTF curing temperature guidance you’ll find online centers on that method rather than the press. Always cross-check against the specific powder maker’s spec sheet before locking in a production setting.
How Do You Diagnose Undercure and Overcure Problems?
Most curing complaints trace back to one of two failure modes, and both leave visible clues if you know what to check.
Undercure shows up as a grainy texture you can feel with a fingertip, a surface that stays slightly tacky after cooling, or adhesion that peels away with minimal pressure. The fix is usually simple: add 10 to 15 seconds of dwell time or bump the temperature by 5 to 10 degrees, then retest. Weak wash performance is the most common downstream symptom of an undercured transfer, so a bad first wash cycle often means the cure step, not the fabric or the press, was the real problem.
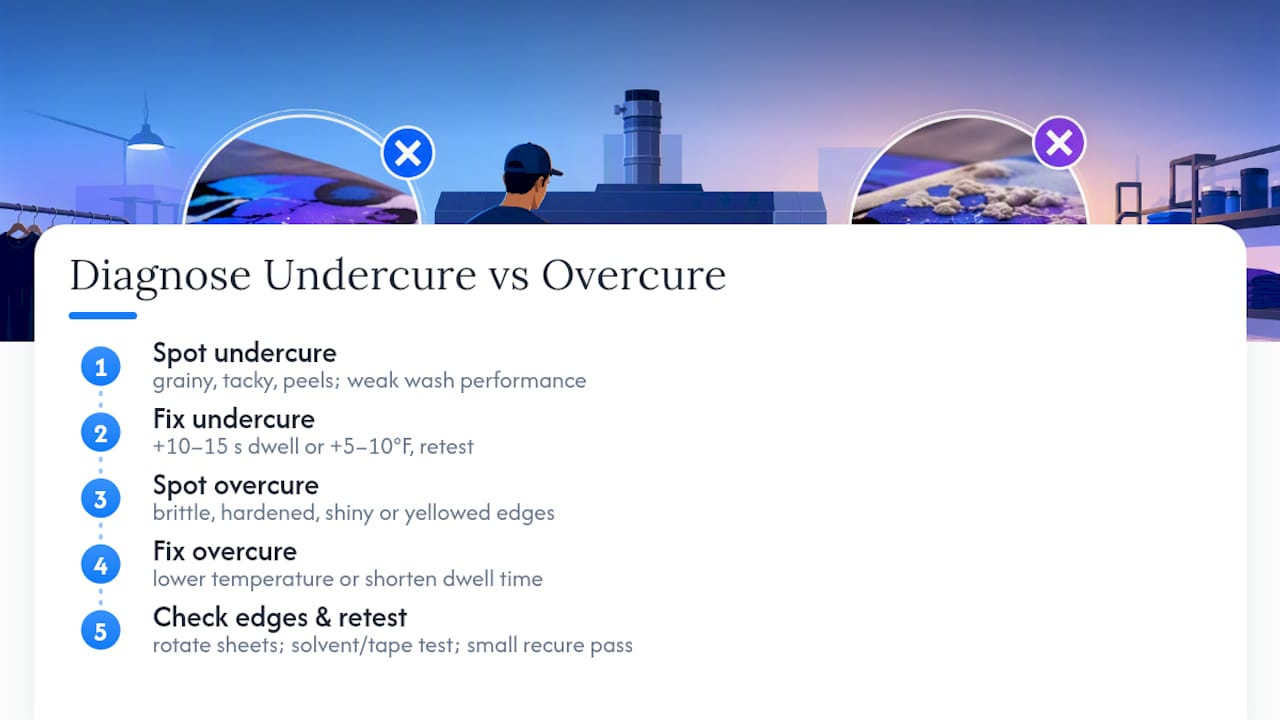
Overcure looks and feels almost the opposite: brittle, hardened, sometimes shiny or slightly yellowed edges. Dial back the temperature or trim the dwell time on your next batch rather than trying to save the current one.
Cold edges on gang sheets deserve their own check. Heating elements often run hotter in the center of an oven or press, leaving the perimeter transfers undercured while the middle looks fine. Rotate sheets or test a corner piece separately.
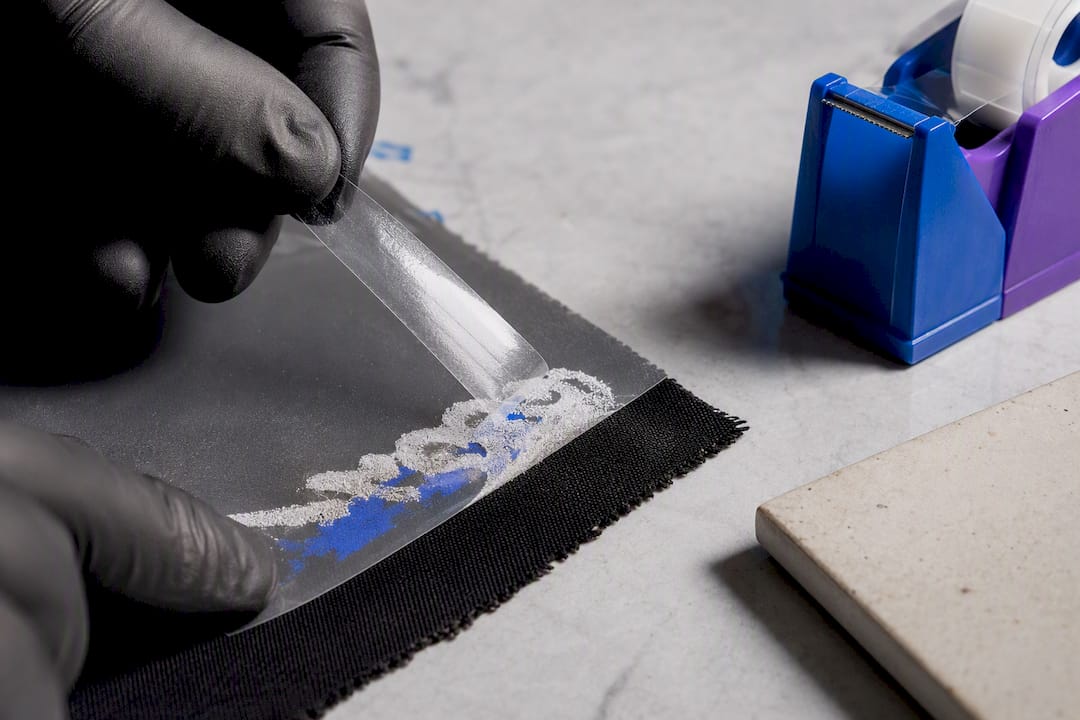
A transfer that’s mildly undercured can sometimes be recured with a short second pass. One that’s already brittle or cracked usually can’t be saved. Run a solvent rub or simple adhesive tape test on a sample corner before you scale any new setting to a full run.
What Storage and Safety Steps Protect Curing Quality?
Curing problems often start before the film ever touches heat. Powder that’s absorbed ambient moisture clumps unevenly and melts inconsistently, which is why humidity is one of the most overlooked variables in DTF quality control.
- Store powder sealed in an airtight container, with a desiccant packet in humid climates.
- Keep your curing area’s humidity low and consistent, ideally in a climate-controlled room.
- Ventilate enclosed ovens and shaker units, since curing concentrates fumes from melted adhesive powder.
- Trust an infrared thermometer or test strip over a built-in equipment readout.
- Skip household ovens entirely. They lack the even, precise temperature control production curing requires, and residue buildup inside a shared oven can transfer to future batches.
Pro Tip: Wipe down trays and cover sheets after every shift. Dried powder residue flakes off and contaminates the next sheet you run, especially on silicone covers that see daily use.
How Tekton LA Approaches DTF Curing in Production
Small-batch DTF work punishes shortcuts fast, and that’s shaped how Tekton LA handles every run that comes through the shop.
Every gang sheet gets a visual check before it leaves the curing stage, and every new powder lot or press setting change gets a wash-tested sample before full production. Consistency at the curing step is key to repeat client satisfaction.
The workflow leans on fundamentals such as verified real temperatures over dial settings, a cooling window before handling, and a stretch or wash check before committing to volume, emphasizing the importance of verification steps to catch problems before orders go out. Understanding how curing quality connects to final wash durability is part of what separates a shop that gets reorders from one that doesn’t.
Why Consistency Matters More Than Perfection
Getting one transfer perfectly cured is easy. Getting the two-hundredth transfer in a gang sheet run to match the first one is the actual job, and that’s where most small shops lose money on reprints. My honest read: buy a curing oven the moment your press starts hovering more than it’s pressing finished garments. Below that point, a careful hover technique is still a reasonable choice, not a compromise.
— Christian
Want Production-Ready Transfers Without Building a Curing Setup?
Running your own curing line makes sense once volume justifies the equipment and the learning curve. If you’d rather skip the ladder tests and wash-test cycles while you scale, Tekton LA runs small-batch DTF production with quality checks built into every stage, so you get consistent results without owning an oven or troubleshooting your own undercure problems.

You can send a sample job through, ask about turnaround on a short run, or pair your transfers with pre-selected blanks instead of sourcing garments separately. If you’re weighing whether to keep curing in-house or hand off a batch, start by browsing Tekton LA’s shirt options to see what a finished, production-quality piece looks like before you decide. For shops still comparing techniques for a specific job, it’s also worth reading how DTF stacks up against screen printing on cost and turnaround before committing to a method. Reach out through Tekton LA to get a quote on your next run.
Sources
- DTF Curing Oven vs Heat Press: Which Is Better for Curing DTF Powder?
- How to Cure DTF Powder?
- Overcuring vs. Undercuring in DTF (How to Tell the Difference) – ImperialDTF
- How to Cure DTF Prints Properly: Temps, Timing & Pro Tips
- Curing DTF Powder: Complete Guide to Temperature, Time & Methods
FAQ
How Long Do You Cure a DTF Transfer?
A curing oven typically needs 2 to 3 minutes at 100–110°C (212–230°F), while a heat-press hover generally takes 60 to 90 seconds at a higher temperature. Actual time varies by powder brand, so confirm with a sample run.
Can I Use My Heat Press to Cure DTF?
Yes, hovering the press above the film without contact works for low-volume shops, typically at 110–120°C (230–250°F) for 60 to 90 seconds. It requires steady technique to keep the gap consistent across the whole design.
Can DTF Powder Be Cured in the Oven?
A dedicated curing oven or conveyor dryer is one of the most reliable methods, running at 100–110°C (212–230°F) for 2 to 3 minutes. A standard household oven is not recommended, since it lacks the even, precise heat control production curing needs.
At What Temperature Do I Heat Press DTF?
For hover curing the powder, start around 110–120°C (230–250°F). For the final application press onto fabric, that’s a separate step with its own settings tied to the garment and film, covered in Tekton LA’s garment printing techniques guide.
Is DTF Curing Necessary Before Pressing Onto a Garment?
Yes. Skipping the cure step leaves powder loose and unmelted, which means the transfer won’t bond to fabric even under a hot final press. Curing has to happen first, every time, regardless of volume.