


Pick embossing when you want a tactile, dimensional logo that commands attention on premium hoodies, outerwear, and limited-run merch. Pick debossing when the goal is a clean, pressed-in mark that reads as understated and professional on corporate sweatshirts, performance wear, and woven or leather labels. Both techniques reshape the fabric surface rather than adding ink or thread, which is exactly why they feel so integrated on the right garment. Cotton fleece, French terry, and heavyweight knits are the sweet spot for both; thin jersey and high-stretch panels are where things get complicated. Tektonla handles both methods in-house, which matters because press force and plate quality are the real gating factors for consistent results.
Key Takeaways
Embossing raises the design above the fabric; debossing presses it in. The right choice depends on your material, your brand tone, and whether your printer has the press force to deliver consistent depth.
| Point | Details |
|---|---|
| Core decision rule | Embossing for tactile, premium pieces; debossing for understated, corporate, or label branding. |
| Best fabrics | Cotton fleece, French terry, and heavyweight knits hold impressions best; avoid thin jersey and high-stretch panels. |
| Artwork essentials | Supply vector files with strokes no thinner than 1pt; simplify fine detail and specify exact placement dimensions. |
| Sample requirement | Approve a physical sample on your actual blank and run at least one wash cycle before full production. |
| Tektonla | Handles custom plate fabrication, high-force pressing, sample and wash-test workflow, and private label options from Downtown LA. |
Table of Contents
- What’s the difference between embossing and debossing on apparel?
- How do embossed and debossed marks look, feel, and hold up?
- What artwork specs do you need for embossing or debossing?
- What drives price and lead time on U.S. embossing orders?
- Which technique should you choose for your branding goal?
- Can you combine embossing or debossing with other techniques?
- What to ask your printer and what to send them
- A production perspective on what actually works
- Tektonla’s embossing and debossing services
- Sources
What’s the difference between embossing and debossing on apparel?
Embossing pushes the design up from the fabric surface. Debossing presses it in. That single mechanical difference drives every downstream decision: which materials work, how the mark ages, and what your printer needs from you.
Common production techniques
The methods used in apparel are more varied than most buyers expect:
- Plate embossing: A precision-machined metal plate applies heat and pressure to raise the design above the fabric surface. Requires high press force and exact pad selection.
- Heat-press debossing: A die presses into the fabric under heat, creating a recessed impression. Lower force threshold than embossing, which makes it more forgiving on mid-weight fabrics.
- Puff screen printing: A foam-based ink that expands under heat, mimicking a raised effect on knits and cotton fleece. Without puff underlay, a raised shape on these fabrics tends to relax and lose contrast after a few washes.
- Emboss films and heat-transfer overlays: A pre-printed film is applied via heat press, adding a textured or metallic surface without a custom die. Faster setup, but adhesion longevity depends heavily on fabric content and wash conditions.
- Leather and PU die-molding: Custom dies press permanent impressions into leather, pleather, and coated materials. These hold the sharpest detail and the longest-lasting depth of any method.
Which materials work best?
Fabrics with loft and structure show the clearest results. Cotton fleece, French terry, and heavyweight knits give the die or plate something to grip. Polyester blends can work but require lower heat settings to avoid scorching. Leather, pleather, and coated woven labels are ideal for debossing because the material holds the impression permanently without rebound. Thin jersey and four-way stretch fabrics are the hardest cases: the fabric’s natural recovery fights the impression, and the mark softens noticeably after washing.
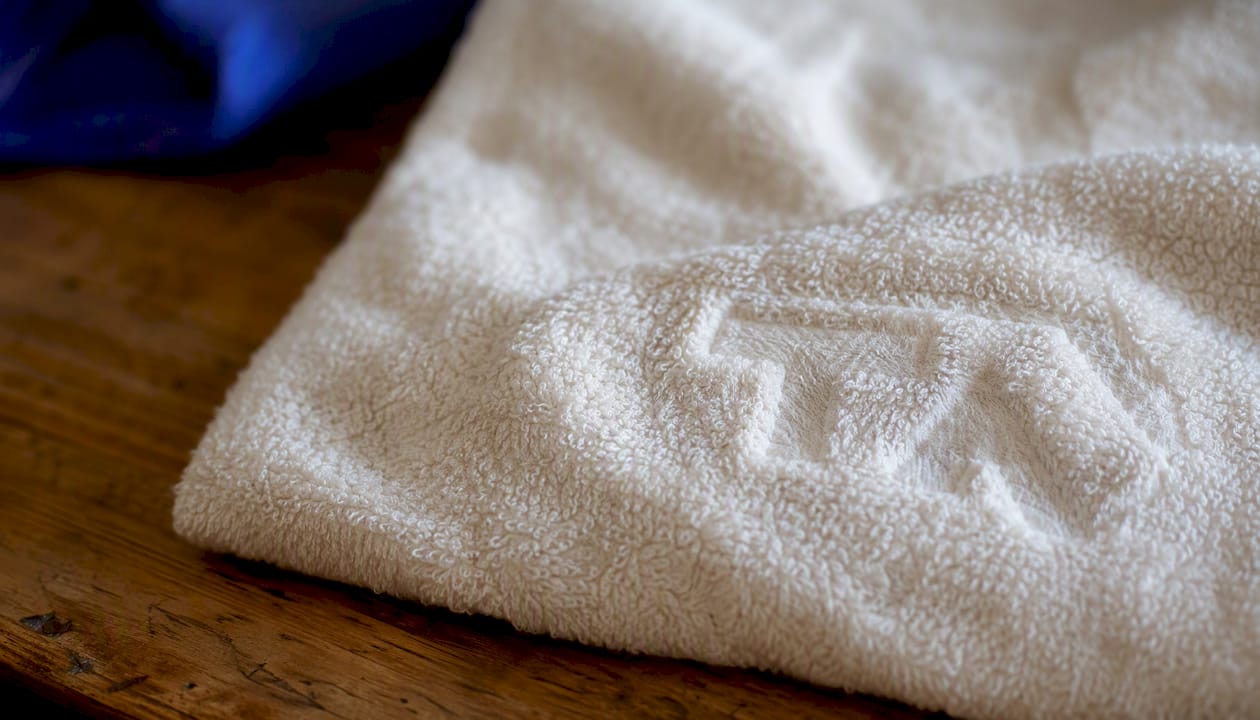
Pro Tip: Avoid placing embossed or debossed marks directly over side seams, underarm gussets, or high-stretch zones like the lower back panel. The uneven surface under the press causes inconsistent depth, and the stretch zone will work against the impression over time. Left chest, upper sleeve, and yoke placements consistently produce the cleanest results.
How do embossed and debossed marks look, feel, and hold up?
| Feature | Embossing | Debossing |
|---|---|---|
| Visual effect | Raised, three-dimensional, catches light | Recessed, shadow-defined, understated |
| Hand feel | Tactile ridge you can feel clearly | Smooth depression, subtle to the touch |
| Best fabrics | Cotton fleece, French terry, heavyweight knits | Leather, PU, woven labels, structured knits |
| Fine detail handling | Moderate; thin strokes can blur under pressure | Better; recessed lines hold sharper edges |
| Comfort impact | Can stiffen the logo area slightly | Minimal stiffness; sits flush with fabric |
| Visibility from distance | High; reads well at arm’s length | Low to moderate; best at close range |
| Durability trend | Good on structured fabrics; softens on thin jersey | Excellent on leather/PU; stable on knits |
Wash cycles are the real test. Structured fabrics like fleece and French terry hold the impression well through repeated washing because the fiber density resists rebound. Thin jerseys and ribbed areas are more vulnerable: the fabric’s elasticity gradually softens the mark, and ribbed textures cause uneven press contact that leads to puckering. Film-based emboss transfers carry an additional risk — delamination at the edges when heat bonding is incomplete or when the garment is washed at high temperatures.
Blind debossing (no foil, no color fill) reads as a modern, tonal mark and is the go-to for corporate athleisure and performance wear where low-profile branding is the brief. Embossing reads louder and more dimensional, which suits premium retail and limited-edition drops.
A physical sample and a wash test are not optional steps. Approve the sample on your actual garment blank, run it through one to three wash cycles, and check for firmness, appearance, and any unwanted stiffening before signing off on a full production run.
What artwork specs do you need for embossing or debossing?
Getting the file right before production starts saves time and money. Here’s what to prepare:
- File formats: Vector files only: AI, EPS, or PDF with all fonts outlined. Single-layer dielines for die fabrication; layered files for multi-step combinations (e.g., deboss outline plus foil fill).
- Minimum stroke weight: No hairlines. Strokes below 1pt at final print size will either disappear or merge under press pressure. A safe floor is 1.5pt for embossing, 1pt for debossing on structured fabrics.
- Minimum logo size: Small text and fine serifs below roughly 0.25 inches in height rarely survive the press cleanly. Simplify complex wordmarks for small placements.
- Negative space: Leave adequate space between design elements. Tight counters (the enclosed spaces inside letters like “O” or “B”) can close up under pressure, especially on softer fabrics.
- Placement dimensions: Specify exact coordinates from a reference point (e.g., 4 inches from the left side seam, 3 inches below the collar). For brand consistency across decoration methods, use the same placement spec across all SKUs in a collection.
Pro Tip: Request a physical sample on the exact garment blank you plan to run, not a substitute. Specify your acceptance criteria in writing before the sample ships: minimum impression depth, acceptable color variation on any foil layer, and pass/fail criteria for the wash test. A signed checklist prevents disputes at approval.
What drives price and lead time on U.S. embossing orders?
Die or plate fabrication is the biggest upfront cost. A custom precision-machined plate for embossing costs more than a debossing die because embossing requires higher press force and tighter tolerances; an imprecise plate produces soft, inconsistent edges at scale. Setup labor, press time, and sample runs add to the per-order cost before a single unit ships. Puff materials and emboss films carry their own per-unit cost on top of setup.
Order quantity is the main lever for reducing per-unit cost; consider how to embellish gift wraps sustainably to complement your eco-friendly branding efforts. Spreading die fabrication across a larger run drops the amortized cost significantly. Combining SKUs that share the same logo placement and die spec is another way to consolidate setup costs.
Industry reporting cited by ASI indicates that tactile design elements can increase perceived product value by approximately 23% in apparel merchandising. That figure gives context for why brands absorb the setup premium on embossed pieces.
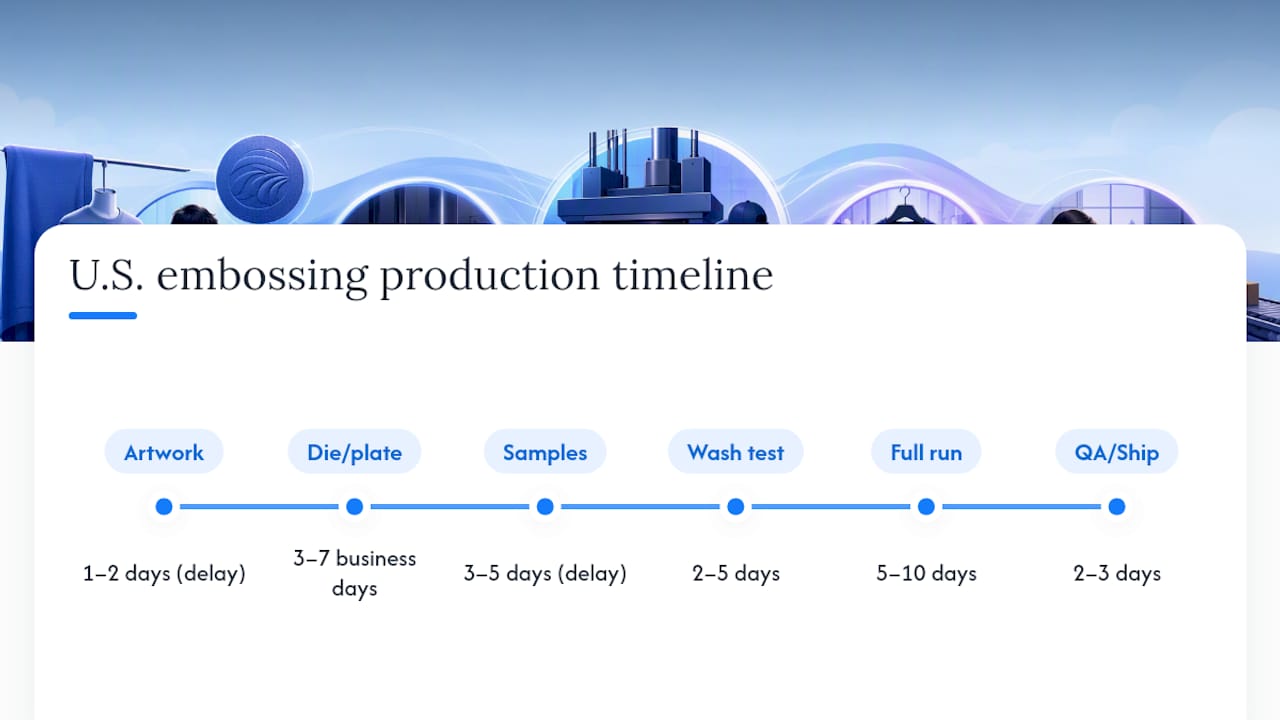
A realistic U.S. production timeline runs roughly like this: artwork approval (1–2 days), die or plate fabrication (3–7 business days), sample production and shipping (3–5 days), wash test and client approval (2–5 days), full production (5–10 days), QA and outbound shipping (2–3 days). Delays almost always happen at artwork approval and sample sign-off. Sending vector-ready files on day one and approving samples quickly cuts a week off most timelines.
Which technique should you choose for your branding goal?
- Premium retail or limited-edition merch: Embossing. The raised mark reads as intentional and high-end on cotton fleece hoodies and outerwear.
- Corporate uniforms or staff apparel: Debossing. The tonal, pressed-in mark looks polished without competing with other design elements.
- Athletic or performance wear: Debossing or puff printing. Embossing can stiffen the logo area; debossing on structured panels or puff on knit panels keeps the garment comfortable.
- Woven or leather labels: Debossing. The material holds the impression permanently and the result is sharper than on fabric.
- Low-cost or disposable event merch: Neither. Setup costs for dies and plates don’t amortize well on short runs of inexpensive blanks. Screen printing or DTG is the better call.
Red flags that should push you away from a technique: tiny text below 0.25 inches, logos placed over high-stretch zones, thin jersey blanks under 5 oz., and orders under roughly 24 units where die costs dominate the per-unit price.
Can you combine embossing or debossing with other techniques?
Yes, and some of the strongest branded pieces use exactly that approach. Debossing paired with foil is a proven combination: the foil sits in the recessed area, catching light against the matte fabric for a refined, high-contrast finish. An embossed chest logo combined with a screen-printed back graphic gives you tactile branding up front and full-color storytelling on the back. Puff underlay beneath a debossed outline creates a layered, sculptural effect on heavier knits.
When layering techniques, watch for heat stack conflicts. Multiple heat applications on the same panel can distort the fabric or reactivate a previous adhesive layer. If your design calls for both a heat-press emboss and a DTF transfer on the same panel, split those operations and let the fabric cool fully between them. In some cases, splitting across two production runs or two vendors is the cleaner solution.
Alternatives worth considering: puff screen printing for lightweight raised effects without die costs, foil transfers for high-contrast metallic marks, embroidery for durability on heavy outerwear, and custom woven labels for sewn-in branding that survives any wash protocol.
What to ask your printer and what to send them
Questions to ask before placing the order
- What is your press force capacity, and can you hit the depth required for my logo size?
- What is your die or plate fabrication lead time, and do you fabricate in-house or outsource?
- What is your sample policy — do you charge for samples, and how many units do you produce?
- Which pad or counter material do you recommend for my blank and placement?
- What is your wash test protocol, and what pass/fail criteria do you use?
Files and information to send
- Vector artwork (AI, EPS, or outlined PDF), single-layer dieline, and any layered combo files
- Exact blank SKU, colorway, and size range you want tested
- Placement spec with measurements from a fixed reference point
- Shipping address for physical proofs
- Written acceptance criteria covering impression depth, hand feel, and wash-test pass/fail
Acceptance criteria for approving production
- Sample photo from at least three angles: straight-on, 45-degree side, raking light to show depth
- Wash test completed (minimum one cycle, ideally three) with no delamination, puckering, or significant softening
- Impression depth consistent across all units in the sample set
- No excessive stiffening in the logo area that would affect wearer comfort
- Signed approval document before full production begins
Approving physical samples on the actual garment blank and running a wash test are the steps most buyers skip and most often regret. Build them into your timeline from the start.
A production perspective on what actually works
Most clients who come to Tektonla asking about embossing have seen it on a competitor’s hoodie and want that same elevated feel. The ones who get the best results are the ones who’ve already simplified their logo before they call. A mark that looks great at two inches on screen often has strokes that are too thin to survive a press at one inch on fabric. The fix is almost always the same: close up the counters, thicken the strokes, and test on the actual blank before committing to a run.
The placement question matters more than most buyers expect. Embossed and debossed marks affect hand feel and stretch in the logo area, and that effect is most noticeable when the mark lands over a seam or a stretch zone. Left chest and upper sleeve placements consistently produce the cleanest impressions and the fewest comfort complaints. If a client insists on a lower-back or side-panel placement, Tektonla always runs a sample first, no exceptions.
Tektonla’s embossing and debossing services
Tektonla runs high-force press equipment capable of the consistent depth that embossing demands, and handles debossing on leather, PU, and structured knits with the same workflow: custom plate or die fabrication, sample production on your chosen blank, wash test, and client approval before full production starts. Private label options, including custom woven labels and branded packaging, are available alongside the decoration work.

To get started, send your vector artwork and your blank SKU to Tektonla and request a physical sample. The team will confirm press capability, recommend pad selection, and walk you through the approval checklist. Browse Tektonla’s printer shirts as a starting blank, or visit Tektonla to request a quote directly.
Sources
- Embossed and Debossed Printing for Apparel: A Buyer’s Guide to Texture-First Branding
- Embossing Apparel: A Complete Start-to-Finish Guide - Promo Impressions
- Embossing and Debossing | SanMar U